How to Clean a Keurig Without Descaling Solution
Keuring owners often want a simple cleaning routine that keeps coffee tasting fresh without pulling out descaling solutions. This guide explains practical, safe methods using common tools and routine maintenance to extend the life of a Keurig machine.
Whether your brewer is slow to brew, shows mineral buildup, or leaks occasionally, a thoughtful cleaning routine can restore performance. The steps below emphasize safe handling, minimal downtime, and maximizing taste between more thorough descale cycles.
Quick Answer
Clean the brewer interior with a gentle flush, wipe the exterior, and use needle care to clear the nozzle. Use a dedicated cleaning brush set for dry residue, and consider specialized cleaning tablets for faster maintenance between deep cleanings.
What You’ll Need
- Keurig needle cleaning tool
- Keurig cleaning brush set
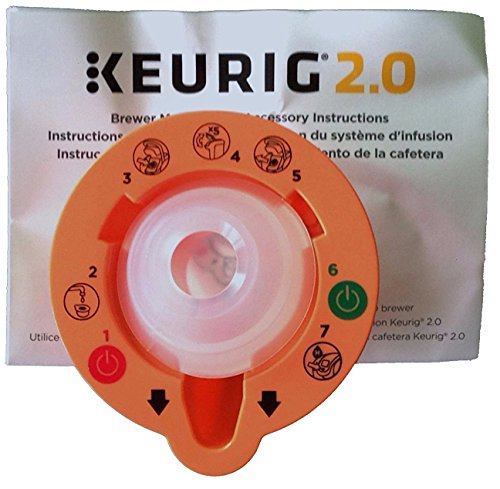
- Keurig cleaning tablets for coffee maker


Before You Start
Prepare a clean workspace and unplug the brewer before any maintenance. Remove used pods and any water from the reservoir. A quick surface wipe around the drip tray helps prevent spills. Time estimate: 20–40 minutes for a full clean, plus a couple of hot-water flushes. Important: never submerge the brewer or its electrical components in water. If the machine is under warranty, check policy terms before using third-party cleaners.
Step-By-Step: How To Clean A Keurig Without Descaling Solution
- Unplug the brewer, remove any removable parts, and detach the water reservoir for easy access.
- Empty the reservoir and rinse with warm water to remove loose coffee residue.
- Use the Keurig cleaning brush set to scrub the interior surfaces where mineral buildup is likely, including the reservoir walls and any accessible passages.
- Insert the Keurig needle cleaning tool into the needle assembly and gently rotate to break up any clogs. Repeat with light pressure until you see a freer flow.
- Rinse the reservoir again, then fill with fresh water. Run several hot-water brews, discarding each cup to flush residues from the system.
- If staining or minor mineral deposits persist, insert the cleaning tablet into the reservoir and run a brew cycle as directed by the package. Rinse thoroughly with clean water after completion.
- Wipe the exterior with a damp cloth, paying attention to the nozzle area and any spill-prone surfaces.
- Reassemble all parts, fill the reservoir with fresh water, and run a few empty cycles to ensure no cleaning residue remains.
- Inspect the needle and nozzle again after a couple of uses to ensure continued clear flow and no blockage.
- Establish a routine: brief monthly cleanups plus a deeper quarterly descale if mineral levels remain visible in the water line.
- Document any recurring issues that persist after cleaning, such as leaking or poor extraction, to help diagnose future problems.
- Store all tools in a dry area away from heat and moisture to prolong their effectiveness for the next cleaning cycle.
Troubleshooting
| Symptom | Likely Cause | Fix | Prevention |
|---|---|---|---|
| Slow brewing or weak coffee | Partial clog or mineral buildup | Repeat needle clean and hot-water flushes | Regular cleaning every 2–4 weeks |
| Water won’t pass through | Clog in needle or passage | Deep clean with needle tool; rinse thoroughly | Use filtered water; avoid mineral-heavy sources |
| Unpleasant taste | Residue or stale water | Flush with multiple cycles; clean reservoir | Replace water daily for hot brews |
| Leaks around the reservoir | Misaligned parts or buildup | Re-seat parts; wipe seals clean | Regular inspection of seals and gaskets |
Common Mistakes
- Using abrasive tools that scratch the surface or damage seals
- Running harsh cleaners through the system without thorough rinsing
- Skimping on a full hot-water flush after cleaning tablets
- Neglecting the needle and nozzle areas during routine maintenance
Tips For Best Results
- Use filtered or bottled water to reduce mineral buildup between cleanings
- Schedule a light monthly clean and a deeper quarterly cleanse to keep performance steady
- Keep the cleaning kit organized in a dedicated drawer or container for quick access
- Document cleaning dates and any unusual performance changes to identify patterns
Call A Professional
Consider professional assessment if the Keurig shows persistent leaks, unusual noises, or if cleaning does not restore proper brewing performance. Stop using the machine if electrical components appear damaged or if there is a strong sulfur or burning odor.
FAQ
Can I use vinegar to clean a Keurig?
Vinegar is not recommended for most Keurig models as it can degrade seals and leave a lingering taste. Use manufacturer-approved cleaning tablets and hot-water flushes instead.
How often should I clean without descaling solution?
Clean the interior monthly with a hot-water flush and brush the accessible areas; perform a deeper cleaning every 2–3 months depending on usage and water hardness.
Is a cleaning tablet necessary if I use filtered water?
Cleaning tablets help remove mineral residue that filtered water may not fully prevent; use them as part of a regular maintenance cycle.
What if my Keurig still tastes off after cleaning?
Try a full reservoir rinse, replace the water with fresh, and consider a full descale if mineral buildup is heavy.
Can I reuse cleaning tools on other appliances?
Tools designed for Keurig are best kept dedicated to the brewer to avoid cross-contamination and avoid damaging seals.
Buying Guide
When choosing cleaning accessories, consider size, compatibility with your Keurig model, and storage space. Look for a cleaning kit that includes a needle tool, a brush set, and compatible cleaning tablets. Factors to weigh include:
- Size and versatility: compact kits fit in small kitchens and work across multiple Keurig models.
- Noise level: tools should operate quietly to avoid disturbing others during early or late cleanings.
- Energy efficiency: routine cleanings extend machine life and reduce energy waste from poor brewing performance.
- Controls and ease of use: simple, clearly labeled tools save time and reduce the risk of damage.
- Placement: store cleaning supplies near the machine for quick, regular maintenance.
Choosing the right set can simplify upkeep and help maintain full flavor between brews. Does your current kit cover needle care, brushing, and tablet-based cleanings? With the right tools, keeping a Keurig clean without descaling solution becomes quick and routine.
Leave a Reply