How to Remove Air Bubbles From a Phone Screen Protector
Air bubbles under a phone screen protector can be frustrating, but most issues are fixable with common tools and careful technique. This guide explains practical steps to minimize or eliminate bubbles, extend the protector’s life, and achieve a smooth, touch-responsive surface.
With the right approach, users can correct misalignments, seal edges, and restore a clean look without damaging the screen or compromising touchscreen accuracy.
Quick Answer
Key tip: Start with a clean surface, remove dust, align the protector carefully, and use a squeegee or bubble removal tool to push air toward the edges. If stubborn bubbles remain, lift the corner gently and re-seat the protector, repeating the squeegee motion from the center outward.
What You’ll Need
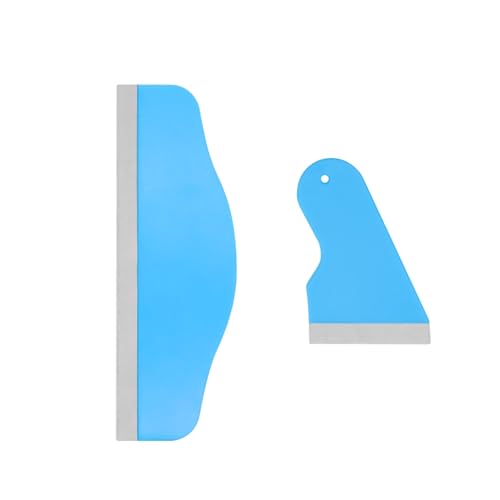
- Phone screen protector installation kit squeegee microfiber cloth alcohol wipes
- Bubble removal tool for screen protectors air bubble remover card
- Dust removal sticker screen protector kit alignment guide


Before You Start
Prepare a clean, dust-free workspace and ensure good lighting. Turn off the phone and place it on a soft, lint-free surface to prevent scratches. Have a steady hand and take your time—hasty attempts can trap dust or crease the protector. The process typically takes about 10–20 minutes, depending on the device size and the protector’s fit. Avoid applying force that could crack the screen.
Step-By-Step: How To Remove Air Bubbles From A Phone Screen Protector
- Power down the phone and remove any case or accessories that could interfere with alignment.
- Wash and dry your hands, then use an alcohol wipe to clean the screen surface thoroughly to remove oils and fingerprints.
- Use a dust removal sticker to dab any remaining particles from the screen. A clean surface prevents new bubbles from forming.
- Peel back a small corner of the protector’s protective film and align it to the phone’s edges and camera cutouts using the alignment guide.
- Gently lay the protector onto the screen, starting from the center and lowering slowly toward the edges.
- Use the squeegee or air bubble remover card to press from the center outward, pushing any trapped air toward the sides.
- For persistent bubbles, slightly lift the edge near the bubble with a fingernail or the bubble removal tool, re-align, and re-squeegee.
- Re-check edges for lift. If the protector rides up, re-apply gentle pressure with the squeegee along the perimeter.
- Wipe the surface with the microfiber cloth to remove fingerprints and ensure a uniform finish.
- Test touch sensitivity by swiping and tapping across the screen to confirm there are no sticky patches or new bubbles forming.
Troubleshooting
| Symptom | Likely Cause | Fix | Prevention |
|---|---|---|---|
| Bubbles near the edges | Dust or lint trapped during application | Lift edge slightly, re-clean edge, re-seat with squeegee | Fresh room, dust-free surface |
| Persistent small bubbles | Excess adhesive or misalignment | Re-align protector center first, re-squeegee | Use alignment guide and slow motion |
| Protector lifts after a day | Adhesive not fully set | Gently press edges with the card; avoid heat | Allow full curing time before use |
| Touch irregularities | Wrinkles under the surface | Replace protector if wrinkled; ensure clean removal | Take time during installation to prevent creases |
Common Mistakes
- Rushing the alignment step and misplacing the protector.
- Not removing all dust particles before application.
- Using excessive force with the squeegee, which can crease the film.
- Skipping the alcohol wipe process, leaving oils on the screen.
- Applying the protector on a humid or windy day, which increases dust.
Following careful steps dramatically improves results and reduces the chance of trapped air bubbles.
Tips For Best Results
- Work in a clean, dust-free room; run a quick fanless check to minimize air movement.
- Keep the protector level with the screen’s edges, using the alignment guide to prevent tilt.
- Use the microfiber cloth for final wipe-down to keep oils away from the adhesive surface.
- Always start from the center and move outward with the bubble removal tool.
- Store extra installation tools for future screen protector changes to ensure consistent results.
Call A Professional
If the screen shows persistent bubbles despite multiple attempts, or if the protector seems misaligned with essential sensors, consider professional help. Stop attempting to reseat if the protector cracks, delaminates, or covers the speaker or camera incorrectly. A trained technician can re-seat or replace the protector with proper equipment.
FAQ
How do I remove air bubbles after installing a screen protector?
Use the center-to-edge squeegee technique, re-clean the surface, and lift small sections if necessary to re-seat properly.
Can dust cause bubbles even with a dust removal sticker?
Yes, tiny particles can still cause bubbles; ensuring a completely dust-free area and a thorough wipe helps prevent this.
What if bubbles appear after a few days?
Gently lift the nearest edge and re-press toward the center, ensuring no dust is trapped during the process.
Is it better to remove and reapply or try to fix bubbles in place?
For most cases, fixing in place suffices, but large or irregular bubbles often require removal and reapplication for best results.
Will alcohol wipes degrade the screen protector adhesive?
Alcohol wipes used sparingly for cleaning are generally safe and help remove oils; avoid soaking the adhesive.
Do different brands affect bubble removal?
Yes, some screen protectors have stiffer adhesives or unique edges; follow included instructions for best results.
Can I apply a protector without an alignment guide?
It is possible, but alignment guides reduce misalignment risk and improve precision during installation.
Buying Guide
When choosing a screen protector installation kit and related tools, consider size, compatibility, and kit contents. A complete kit with a squeegee, microfiber cloth, alcohol wipes, dust removal stickers, an air bubble removal card, and an alignment guide offers the most reliability for safe, bubble-free results. Look for anti-static properties in the screen protector kit if available, and verify that accessories fit your specific device model. A well-rounded kit is often more effective than buying individual tools separately.
Additional Buying Factors
- <bSize and fit: Ensure the protector covers the screen without blocking sensors or cameras.
- <bNoise and reflection: Some films reduce glare; check finish options that suit daily use and photography needs.
- <bEnergy efficiency (adhesive and materials): High-quality adhesives maintain long-term adhesion with minimal residue.
- <bControls and touch: Opt for a protector with responsive feel and smooth glide for accurate touch input.
- <bPlacement and alignment tools: Kits with alignment guides improve initial placement accuracy.
- <bDurability and warranty: Consider a protector with a consumer-friendly warranty for peace of mind.
Leave a Reply