How to Clean a Toilet Tank With Vinegar
Cleaning a toilet tank with vinegar offers a simple, affordable way to remove mineral scale, mildew, and odors without harsh chemicals. This method focuses on safe cleaning practices that protect the toilet’s components while improving overall performance. Proper prep and careful handling are key to avoiding damage to gaskets, seals, or the flush mechanism.
Below is a practical, step-by-step guide designed for American households. It emphasizes using common household supplies and targeted tools to enhance effectiveness and ease of use.
Quick Answer
Fill the tank with a vinegar solution, let it sit to break down mineral buildup, then scrub the interior with a long-handled brush. Rinse by flushing multiple times and repeating if necessary. Always disconnect power or water supply as advised by your manufacturer and keep metal parts dry to prevent corrosion.
What You’ll Need
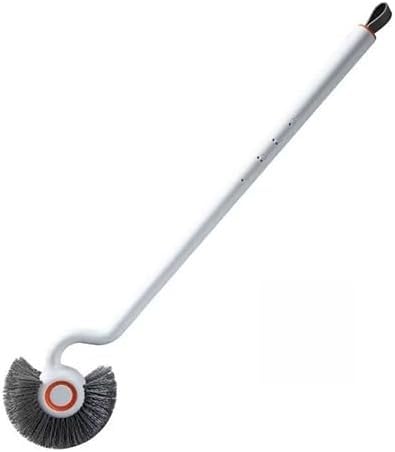
- Toilet tank cleaning brush long handle
- Toilet flush valve cleaning tool
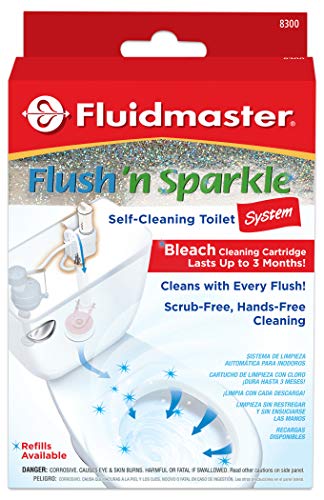
- Toilet tank cleaning kit
- White distilled vinegar (5–6 cups or as needed)
- Bucket or old towels for spills
- Gloves and protective eyewear
- Old rags for drying and cleanup

Before You Start
Prepare the area by turning off the water supply to the toilet and flushing to empty the tank. Protect floors from spills with towels or a tray. Vinegar is safe for most plumbing, but avoid mixing it with bleach or ammonia, which can release harmful gases. If your toilet has a fragile handle or unusual valve design, consult the manufacturer’s guidance before proceeding.
Time estimates: 20–40 minutes for a standard tank; longer if there is heavy buildup. If you notice any cracking, leaking, or corroded components, pause and consider professional help.
Step-By-Step: How To Clean A Toilet Tank With Vinegar
- Shut off the water supply and flush to empty the tank. Use a towel to catch any residual water at the bottom.
- Remove the tank lid and inspect for cracks or loose components. If the lid is fragile, set it aside carefully on a padded surface.
- Pour distilled white vinegar into the tank, filling to about halfway. Add enough water to ensure the vinegar contacts all interior surfaces and deposits.
- Let the solution sit for 15–30 minutes to loosen mineral deposits and mildewed residue. Do not leave aluminum parts in vinegar for extended periods, as it can react.
- Use the toilet tank cleaning brush long handle to scrub the interior walls and corners. Focus on areas with visible scale or discoloration, working in gentle circular motions.
- For stubborn buildup around the flush valve, employ the toilet flush valve cleaning tool to carefully access tight spots without bending or stressing seals.
- Rinse by turning the water supply back on slowly and allowing the tank to fill. Flush once or twice to remove loosened deposits and vinegar residue.
- If odor or scale persists, repeat the vinegar soak and scrub cycle once more, then perform a final full flush to ensure the tank is clean and neutral smelling.
- Dry the exterior and the top edge of the tank with a cloth. Replace the lid and test the flush mechanism for smooth operation.
- Store vinegar safely and ensure ventilation while cleaning. Reintroduce any decorative items only after the tank is completely dry.
Troubleshooting
| Symptom | Likely Cause | Fix | Prevention |
|---|---|---|---|
| Persistent mineral rings after cleaning | Heavy mineral buildup | Repeat vinegar soak and scrub; consider a longer soak time | Low-mineral water or routine maintenance |
| Flushing feels weak or partial | Partial valve obstruction | Inspect and clean flush valve with toilet flush valve cleaning tool | Regular cleaning to prevent buildup |
| Rattling or unusual noises | Air in the line or loose components | Reconnect water supply tightly and flush slowly to prime | Check seals periodically |
| Strong vinegar smell after flush | Residual solution remains | Run an extra full flush after cleaning and ventilate the room | Avoid overfilling the tank |
| Discolored water during flush | Contaminated line or tank surfaces | Repeat cleaning cycle with fresh vinegar and water | Maintain a routine tank cleaning schedule |
Common Mistakes
- Using undiluted cleaners or bleach in combination with vinegar
- Over-soaking metal parts, which can lead to corrosion
- Forgetting to turn off the water supply before starting
- Ignoring manufacturer guidance for unique tank designs
To avoid these mistakes, follow the steps carefully, keep metal surfaces dry, and consult product manuals if you encounter unusual configurations.
Tips For Best Results
- Use distilled vinegar for a consistent cleaning effect and fewer impurities.
- Warm vinegar can speed up mineral dissolution, but do not heat in the tank itself; use room-temperature solution.
- Conduct periodic maintenance every 6–12 months to prevent buildup and maintain flush efficiency.
- Combine vinegar cleaning with preventive measures, such as regular toilet care and water quality checks.
Call A Professional
Stop and call a pro if you notice cracks in the tank, persistent leaks after cleaning, or a faulty flush valve that cannot be adjusted safely. Do not attempt to replace internal tank components unless you have proper training and the right replacement parts. Severe corrosion, persistent clogs in the supply line, or damage to the toilet’s base are signals to seek professional assistance.
FAQ
Can I use vinegar to clean a toilet tank with a plastic flush valve?
Yes, vinegar is generally safe for plastic valves, but avoid prolonged contact with fragile seals and follow the manufacturer’s guidelines.
How often should I clean a toilet tank with vinegar?
For most homes, a biannual or annual cleaning cycle works well, with more frequent maintenance in areas with hard water.
Is vinegar alone enough to remove tough limescale?
Vinegar helps, but very hard water may require a dedicated descaling product or a longer soak with a vinegar-water mix.
Will vinegar damage metal parts inside the tank?
Prolonged exposure can corrode some metals; rinse thoroughly and dry metal components after cleaning.
Can I reuse the same vinegar solution?
Reusing is not recommended once the solution has collected mineral debris; fresh vinegar provides better results.
What if the tank still smells after cleaning?
Ensure thorough flushing and ventilation; a new vinegar cycle followed by a deodorizing rinse can help.
Is it necessary to remove the tank lid?
Removing the lid is optional but helpful for visual inspection and precise cleaning; handle carefully.
Buying Guide
When choosing tools and products for cleaning a toilet tank with vinegar, consider size, compatibility, and ease of use. A longer handle for the brush reduces bending and keeps hands dry. A dedicated toilet flush valve cleaning tool helps access hard-to-reach areas without stressing seals.
Key factors include size and design of the tank, noise level during flushing, energy efficiency of the toilet system, and the placement of the tank in the bathroom. Look for a comprehensive toilet tank cleaning kit that includes a long-handled brush, a flush valve cleaner, and simple accessories for a complete, user-friendly cleaning experience. For homes with hard water, consider cleaning kits and tools rated for mineral buildup, and store cleaning materials safely away from children.
Consider whether you prefer a reusable brush with replaceable heads or a disposable kit for quick, low-maintenance cleaning. If space is limited, compact tools that store neatly behind or beside the toilet offer practical convenience. Finally, verify compatibility with your model’s flush valve and tank design to ensure smooth operation and avoid potential damage.
Leave a Reply