How to Get Rid of Tomato Stains on Plastic
Tomato stains can cling stubbornly to plastic surfaces, from food containers to kitchen utensils. With the right approach, most marks fade or vanish without harsh scrubbing. This guide outlines practical methods using common household products and safe plastic formulations to restore plastic items to their original look.
Quick Answer
For quick, safe results, start with a melamine sponge or a plastic-safe stain remover gel designed for tomato stains on plastic. If stains persist, a paste made from baking soda and hydrogen peroxide can be applied, then scrubbed gently. Always test a small area first and rinse thoroughly.
A Quick List Of What You’ll Need
Below are the essential tools and products tailored for safely removing tomato stains from plastic surfaces. The items leverage gentle abrasion or chemical action appropriate for typical household plastics.
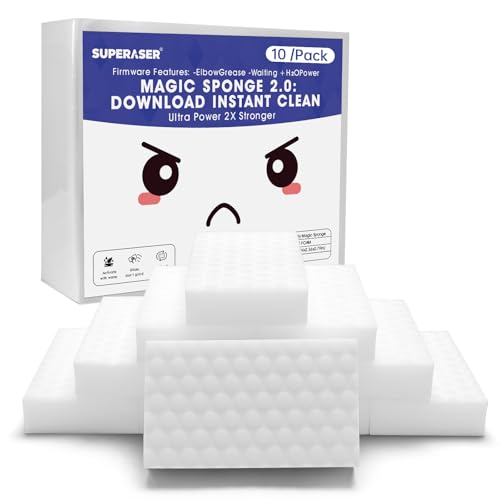
- Melamine sponge magic eraser for removing tomato stains from plastic surfaces
- Plastic-safe stain remover gel for tomato stains on plastic
- Baking soda hydrogen peroxide paste cleaner for plastic dishes and plastic surfaces
- Soft cloths or microfiber towels
- Old toothbrush or soft bristle brush
- Warm water and mild dish soap

Before You Start
Prepare a clean workspace and gather materials. Do not use abrasive scrubbers on delicate plastics, as they can scratch surfaces. Always perform a spot test on a hidden area before full application. Plan for a brief cleaning session: most stain removal tasks take 5–15 minutes, depending on the severity.
Safety notes: if you’re cleaning food-contact plastic, ensure that any cleaners are food-safe or thoroughly rinsed. For sensitive plastics or coated surfaces, avoid harsh chemicals and stick to gentler methods first.
Step-By-Step: How To Remove Tomato Stains On Plastic
- Rinse the stained area with warm water to loosen surface residue and prevent spreading.
- Gently rub with a melamine sponge magic eraser for removing tomato stains from plastic surfaces dampened with water. Use light, even pressure and test a corner first.
- If the stain persists, apply a plastic-safe stain remover gel for tomato stains on plastic directly to the spot. Follow the product’s instructions for contact time and rinsing.
- For tougher stains, mix a baking soda hydrogen peroxide paste cleaner for plastic dishes and plastic surfaces by combining baking soda with a small amount of hydrogen peroxide until a thick paste forms. Apply to the stain and let sit for 5–10 minutes.
- Gently scrub with a soft-bristle brush or microfiber cloth in circular motions. Avoid aggressive scrubbing to prevent scratching.
- Rinse thoroughly with warm water and repeat steps as needed until the stain fades. Dry with a clean cloth to inspect the result.
- If any residue remains, repeat a light cleaning cycle or switch to a different method (e.g., gel remover followed by a gentle rinse).
- For porous or textured plastics, consider a second pass with the baking soda paste and a soft brush to target recessed areas.
- Finish with a thorough rinse and a quick wipe-down to restore shine and prevent soap film buildup.
- Store cleaners out of reach of children and ensure containers are sealed after use.
Troubleshooting
| Symptom | Likely Cause | Fix | Prevention |
|---|---|---|---|
| Stain remains after first pass | Stain deeply embedded or on textured surface | Apply gel stain remover and/or baking soda paste; gentle brush in circular motions | Pre-treat stains promptly; rinse after use |
| Surface feels scratched | Abrasion from sponge or brush | Switch to softer cloth and mild cleaning agents | Avoid aggressive scrubbing; test in hidden area |
| Discoloration reappears after drying | Residual dye trapped in micro-crevices | Repeat cleaning cycle with a gentle approach | Limit exposure time of cleaners; rinse thoroughly |
| Streaks after cleaning | Soap film or mineral residues | Rinse well and dry with a lint-free cloth | Rinse promptly after cleaning; dry surfaces |
Common Mistakes To Avoid
- Using harsh abrasive pads on plastics, which can scratch and dull the surface.
- Over-soaking items that are not dishwasher-safe or have delicate coatings.
- Relying on a single method for deeply set stains; some plastics respond better to different approaches.
- Skipping a spot test, which can reveal if a cleaner damages the finish.
Tips For Best Results
- Test any cleaning product on a hidden area before full application to check for colorfastness.
- For stubborn stains, let cleaners sit for a few minutes to penetrate dye residues before scrubbing.
- Use warm—not hot—water to avoid warping plastic or setting stains deeper.
- Combine methods: start with a melamine sponge, move to a gel remover, and finish with a baking soda paste if needed.
- Dry surfaces after cleaning to prevent water spots and to better evaluate stain removal progress.
Call A Professional
Consider professional help if stains are on high-value or specialized plastics (such as medical-grade plastics or heat-sensitive components). Seek expertise if stains persist after multiple attempts, if the plastic shows signs of cracking, warping, or chemical incompatibility with household cleaners, or if the item is used for food storage and safety is a concern.
FAQ
Can I use bleach on tomato stains on plastic?
Bleach is generally not recommended for most plastics as it can degrade the surface over time. Use gentler methods first and consult product instructions if considering stronger cleaners.
Will tomato stains come out from colored plastics?
Results vary by dye and plastic type. Start with mild methods and proceed to paste or gel cleaners as needed.
Is melamine sponge safe for all plastics?
Most plastics tolerate melamine sponges, but test first on a hidden area to ensure no surface damage.
How long should I let a stain remover gel sit?
Follow the product’s label for contact time. If no label is available, 5–10 minutes is a common safe window, then rinse thoroughly.
Buying Guide
When choosing products to tackle tomato stains on plastic, consider several factors to ensure effective and safe results.
Size and coverage
Smaller containers and travel sizes may be enough for containers and utensils, while larger bottles are convenient for bulk kitchen plastic surfaces.
Noise level
Cleaning tools that require scrubbing can produce audible noise; choose softer tools if noise is a concern in quiet spaces.
Energy efficiency
Manual cleaning uses no energy beyond your effort; if using a powered scrubber, opt for energy-efficient models with gentle settings.
Controls and ease of use
Gel removers and paste cleaners that require minimal contact time and simple rinsing simplify the process and reduce risk of damage.
Placement and storage
Store cleaners away from food, in a cool, dry place. Keep containers upright and out of reach of children.
Material compatibility
Verify that cleaners are labeled safe for plastic surfaces, especially if the items contact food or beverages.
Performance comparison
For light stains, a melamine sponge and mild gel remover often suffice. For deeper discoloration, baking soda and hydrogen peroxide paste offers a robust option.
Cost and availability
Choose a balanced mix of accessible, mid-range products that cover both quick fixes and deeper cleanings, ensuring you have a reliable option on hand.
Leave a Reply