How to Clean Non Washable HEPA Filter for Air Purifier
Non-washable HEPA filters, common in many air purifiers, require careful cleaning and maintenance to extend their life and maintain filter efficiency. This guide provides practical steps, safety notes, and practical alternatives that work within the constraints of non-washable designs available in American households and markets.
Quick Answer
For non-washable HEPA filters, use a dusting tool to remove surface dust, a soft brush to dislodge debris, and a vacuum attachment designed for non-washable filters. Do not soak or rinse the filter. If the filter is heavily soiled or reduced in airflow, replace it with a new, compatible unit rather than attempting washing.
What You’ll Need
- replacement HEPA filter for air purifier true HEPA 4x10x1 (for replacement when cleaning is insufficient)
- HEPA filter cleaning brush for non-washable filters
- dusting vacuum attachment for non-washable HEPA filter
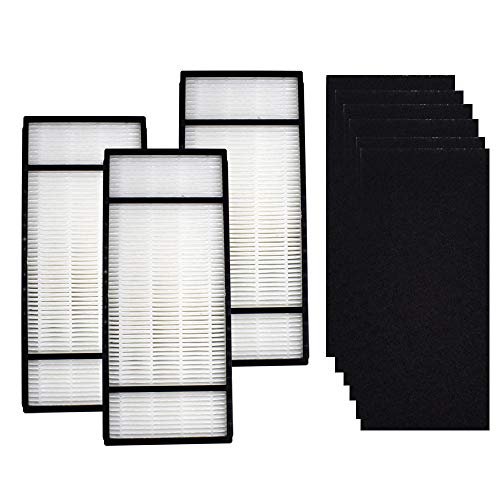


Before You Start
Read the air purifier’s user manual to confirm whether the filter is truly non-washable and to learn any model-specific guidance. Work in a clean, well-lit area and wear a dust mask if you are sensitive to dust. Turn off and unplug the unit before touching the filter. Plan for a 10–20 minute maintenance window per cycle. Avoid getting moisture on non-washable filters as water can damage the media and void warranties.
Step-By-Step: How To Clean Non Washable HEPA Filter
- Power off and unplug the air purifier, then open the access panel according to the manual.
- Carefully remove the non-washable HEPA filter from the housing, keeping it oriented as it was installed.
- Inspect the filter for obvious signs of damage, warping, or mold. If present, replace rather than clean.
- Using the dusting vacuum attachment for non-washable HEPA filter, gently remove loose surface dust by hovering along the filter surface without pressing hard.
- Apply the HEPA filter cleaning brush for non-washable filters to loosen embedded dust in creases and pleats. Use light, even strokes.
- Vacuum again to lift loosened dust from the pleats. Avoid compressing the filter media.
- Wipe down the surrounding housing with a dry microfiber cloth to minimize re-entrainment of dust when reassembling.
- Inspect the seal and gasket around the filter slot for wear; replace if damaged to maintain proper filtration.
- Reinsert the filter in the correct orientation and reassemble the unit. Run the purifier on a low setting for 5–10 minutes to verify airflow.
- Record the cleaning date and any notes about performance. Consider scheduling routine cleanings every 1–3 months depending on usage and air quality.
- If airflow remains weak after cleaning, consider replacing the filter with a compatible new model.
- Dispose of used dust properly and wash hands after handling dusty components.
Troubleshooting
| Symptom | Likely Cause | Fix | Prevention |
|---|---|---|---|
| Low airflow after cleaning | Filter clogged with trapped dust | Clean surface dust and replace if necessary | Clean more frequently; use appropriate cleaning tools |
| Unpleasant odor | Mold growth in filter housing or surrounding area | Clean housing, replace filter if odor persists | Keep area dry; avoid moisture exposure |
| Visible damage to filter media | Filter is worn or compromised | Replace with a compatible new filter | Schedule timely replacements; don’t over-clean |
| Unit not powering on after reassembly | Improper filter seating or loose components | Recheck seating and connections | Follow manual steps precisely during reassembly |
Common Mistakes
- Washing a non-washable filter or exposing it to water
- Using aggressive brushes that damage the filter pleats
- Cleaning with excessive force or not re-seating the filter properly
- Neglecting to replace the filter when airflow remains poor
To avoid these issues, stick to dry dust removal methods, use the recommended tools, and replace the filter when performance is compromised.
Tips For Best Results
- Coordinate cleaning with seasonal changes when indoor dust levels can rise.
- Keep spare non-washable filters on hand to minimize downtime.
- Use the cleaning tools designed for non-washable filters to maximize effectiveness.
- Document maintenance dates to build a predictable replacement schedule.
Call A Professional
Seek professional help if the air purifier shows persistent reduced airflow after cleaning, emits unusual noises, or if the filter housing appears damaged. If you notice mold growth inside the unit, stop use and contact customer support or a qualified technician.
FAQ
Can I wash a non-washable HEPA filter?
No. Washing can damage the filter media and reduce filtration efficiency. Use dry cleaning methods or replace the filter.
How often should I replace a non-washable HEPA filter?
Replacement frequency depends on usage, air quality, and manufacturer guidelines; replace when airflow drops noticeably or if cleaning no longer restores performance.
What tools help with cleaning non-washable filters?
Use a dusting vacuum attachment for non-washable HEPA filter and a HEPA filter cleaning brush for non-washable filters for best results.
Is it safe to operate the purifier after cleaning?
Yes, after a careful dry-cleaning pass and verifying proper filter seating, run the unit on a low setting briefly to confirm airflow.
Should I reassemble the unit before testing airflow?
Yes. Ensure the filter is correctly seated and the access panel is secured before powering on.
What if the odor persists after cleaning?
Replace the filter and clean the housing to remove residual odors.
What maintenance cadence is ideal for a busy household?
Plan a monthly quick dusting and a quarterly thorough cleaning, with replacement aligned to manufacturer guidance.
Buying Guide
Choosing the right replacement and maintenance approach for non-washable HEPA filters involves several factors. Consider size compatibility with your air purifier, noise level during operation, energy efficiency, control features (auto modes, indicators), and placement within a room. A properly matched filter maintains airflow, reduces indoor dust, and supports healthier air. When evaluating options, ask: Is the filter size 4x10x1 to fit the unit? Does the replacement support true HEPA efficiency? Are there compatible tools designed to assist dry cleaning? Is the replacement easy to source locally or online? For households with allergy concerns, a true HEPA replacement can be a crucial upgrade. If your purifier’s design supports a modular cleaning approach with dedicated tools, consistent use of those tools will deliver the best long-term results.
Leave a Reply