How to Clean a Bathroom Step-by-Step: A Practical Guide
Keeping a bathroom sparkling clean requires a simple, repeatable routine. This guide walks American homeowners through a practical, step-by-step method to achieve a fresh, sanitary bathroom space using accessible tools andProducts designed for effective cleaning.
By following the steps, you can minimize buildup and maintain surfaces from sinks to showers with confidence. The approach emphasizes efficiency, safety, and consistent maintenance that fits busy lifestyles.
Quick Answer
To clean a bathroom step-by-step, gather your supplies, start with a dry wipe to remove loose debris, apply appropriate cleaners to fixtures, scrub grout and tiles, rinse, dry surfaces, and finish with a protective touch to prevent future buildup.
What You’ll Need
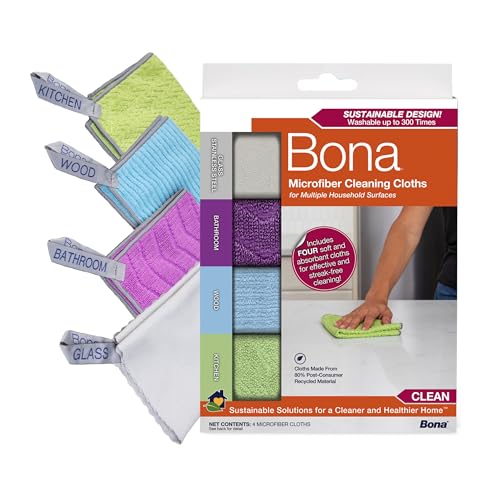
- Microfiber bathroom cleaning cloths set for streak-free drying and multi-surface use
- Angled grout brush for tile grout cleaning to target narrow lines
- Stainless steel bathroom squeegee for shower doors to prevent water spots
- Cleaner appropriate for sinks, countertops, and tiles
- All-purpose or bathroom-specific cleaner for grout and fixtures


Before You Start
Prepare the area by removing items from countertops and shower shelves. Ventilate the room if possible to reduce chemical fumes. Protect your skin by wearing gloves and avoid mixing cleaners that can release harmful fumes. Time estimate: 30–60 minutes for a typical full bathroom once you’re familiar with the routine. Important cautions include never mixing bleach with ammonia-based cleaners and keeping cleaners away from children and pets.
Step-By-Step: How To Clean A Bathroom Step-By-Step
- Clear surfaces and dust corners: Remove items from counters and wipe down with a dry microfiber cloth to lift dust.
- Wipe mirrors and glass: Spray a glass cleaner and wipe in a vertical then horizontal motion to avoid streaks.
- Clean the sink and vanity: Apply bathroom cleaner to the sink, faucet, and countertop; scrub gently with a non-scratch pad, then wipe clean.
- Scrub grout and tiles: Use the angled grout brush for tile grout cleaning to scrub grout lines in the shower and around the tub; rinse with warm water.
- Focus on the toilet: Apply cleaner to the bowl, scrub under the rim, and wipe the exterior with a fresh cloth; don’t forget the seat hinges.
- Shower doors and fixtures: Use the stainless steel bathroom squeegee for shower doors to remove excess water after cleaning and to prevent water spots.
- Rinse and dry: Rinse all surfaces with clean water and dry with a fresh microfiber cloth to avoid streaks and water spots.
- Disinfect high-touch areas: Wipe door handles, light switches, and faucet knobs with a disinfecting wipe or spray, following product directions.
- Finish with a deodorizing or protective spray: Lightly mist the air with an odor-control spray and wipe for a clean, fresh scent.
- Put items back neatly: Return toiletries and tools in their places to maintain a tidy space for the next cleaning.
- Inspect and repeat: If you notice buildup, repeat the affected steps and adjust products as needed for future cleanings.
Troubleshooting
| Symptom | Likely Cause | Fix | Prevention |
|---|---|---|---|
| Streaky mirrors | Residual cleaner or hard water | Wipe with a dry microfiber cloth after the cleaner dries | Use a dedicated glass cleaner and dry immediately |
| Stains on grout | M mildew or mineral deposits | Apply a grout cleaner and scrub with the angled grout brush | Clean grout regularly to prevent buildup |
| Water spots on metal fixtures | Water minerals and insufficient drying | Dry surfaces with microfiber cloth and use squeegee after showers | Wipe down surfaces after each use |
| Persistent odors | Poor ventilation or hidden mold growth | Improve ventilation; check for leaks; clean with disinfectant | Keep a window open or run exhaust fan during and after cleaning |
Common Mistakes
- Using abrasive pads on delicate surfaces, causing scratches
- Neglecting corners and grout lines during routine cleanings
- Mixing cleaners without checking compatibility on surfaces
- Skipping the drying step, which invites streaks and mildew
Tips For Best Results
- Clean from top to bottom to prevent re-cleaning lower surfaces
- Use microfiber cloths exclusively for streak-free results
- Let cleaners sit briefly on tough grime before scrubbing
- Schedule a quick weekly maintenance to reduce deep cleaning time
- Store tools in a ready-to-go kit to streamline the process
Call A Professional
Consider calling a professional if you notice persistent mold growth, persistent tile or grout damage, or persistent plumbing leaks that could cause water damage. Seek expert help for complex issues such as hidden mold behind walls or recurring structural leaks.
FAQ
How long does a typical bathroom cleaning take?
Most bathrooms take 30–60 minutes once you have the routine down, depending on space and grime level.
Can I use the microfiber cloths on all surfaces?
Yes, microfiber cloths are versatile for countertops, mirrors, and fixtures, but check product labels for any surface-specific cautions.
What should I do after cleaning the grout?
Rinse the area well and allow it to dry completely to prevent new grime from forming.
How often should I replace cleaning tools?
Inspect cloths and brushes regularly; replace when frayed, torn, or mildewed to maintain performance.
Is it safe to use bleach in bathrooms?
Bleach can be effective but should be used with caution and never mixed with ammonia or acidic cleaners.
What maintenance helps keep bathrooms cleaner longer?
Regular wiping, quick cleanups after showers, and consistent grout care prevent heavy buildup over time.
Should I use a separate sponge for grout versus surfaces?
Using dedicated tools helps prevent cross-contamination between dirty grout and clean surfaces.
Buying Guide
Choosing the right tools for a bathroom cleaning routine matters. Consider the following factors to optimize performance, especially for a busy American home.
- Size and layout: Larger bathrooms may benefit from longer-handled tools and more microfiber cloths to reduce bending. Smaller spaces benefit from compact squeegees and versatile cloth sets.
- Noise level: Some scrub brushes and vacuums can be noisy; look for models with quiet motors if the bathroom is near bedrooms or living areas.
- Energy efficiency: While cleaning tools don’t consume energy like appliances, powered cleaning aids (like steamers) should be energy-conscious and used sparingly for efficiency.
- Controls and ease of use: Ergonomic handles, non-slip grips, and easy-access spray triggers help reduce fatigue during cleaning sessions.
- Placement and storage: A dedicated cleaning caddy or wall-mounted organizer keeps products within reach and prevents clutter.
- Material compatibility: Check surfaces (stainless steel, tile, glass) and choose cleaners and tools that won’t scratch or dull finishes.
- Durability and replacement parts: Invest in sturdy tools, particularly brushes and squeegees, and replace worn heads to maintain effectiveness.
- Brand ecosystem: If you already use a specific brand, consider its compatible tool set (like microfiber cloths, grout brushes, and squeegees) to streamline replacements.
When evaluating options, prioritize products that align with your typical bathroom types—shared family bathrooms or guest bathrooms may require more durable, repeatable tools. Would a compact kit or a full set of dedicated tools better fit your cleaning cadence?
Leave a Reply