How to Clean a Keurig Effectively and Safely
Keeping a Keurig brewing system clean helps preserve flavor, extend the machine’s life, and prevent buildup that can affect performance. This guide provides practical steps using commonly available cleaning and descaling products, with a focus on safety and efficiency for American households.
Quick Answer
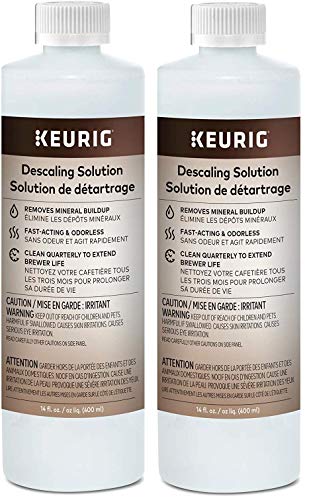
Run a descaling solution through the brewer following the manufacturer’s instructions, then rinse with plain water. Use a Keurig descaling solution 20 oz or descaling tablets for periodic deep clean, and supplement with a Keurig cleaning kit for outlets, needles, and removable parts.
What You’ll Need
- Keurig descaling solution 20 oz or compatible descaling tablets for coffee maker
- Keurig cleaning kit for internal parts and needle maintenance
- Fresh, clean water for rinsing
- Soft cloth or sponge for exterior wipe-down


Before You Start
Unplug the machine before any disassembly. Empty the water reservoir and remove any used pods. Disconnect and unplug the brewer during cleaning to avoid electrical shock. Plan for a 60–90 minute window for a full descaling and rinse cycle, including multiple water runs. Ensure the machine is on a stable, level surface, away from heat and direct sunlight.
Step-By-Step: How To Clean A Keurig
- Remove the water reservoir, rinse it, and fill it with fresh water. This is your rinse water for the process.
- Prepare the descaling solution by following the product instructions, then add it to the reservoir. If using tablets, crush or dissolve them according to the kit directions.
- Run a brewing cycle with no mug to circulate the descaling solution through the internal tubes. Repeat until the reservoir is empty.
- Let the machine sit for 15–20 minutes with the descaling solution in the reservoir to soften mineral buildup inside the system.
- Fill the reservoir with fresh water and run multiple rinse cycles to remove any remaining descaling solution taste or residue. Aim for at least 2–3 full reservoir rinses.
- Inspect the needle and outlets using the Keurig cleaning kit instructions. Clear any clogs or debris with the included tools, taking care not to damage seals.
- Wipe the exterior and removable parts with a damp cloth. Dry all surfaces before reassembling and reattaching the reservoir.
- Run a final brew using just water to confirm the machine is functioning properly and flavor-free.
- Reassemble, refill the reservoir, and test with a cup of fresh water or coffee to confirm the clean performance.
Troubleshooting
| Symptom | Likely Cause | Fix | Prevention |
|---|---|---|---|
| Brewer stops mid-brew | Clogged needle or narrow passage | Use cleaning kit tools to clear; run extra rinse | Regular cleaning schedule; avoid using beans with fines |
| Weak or no flow | Low water level or blocked filters | Refill reservoir; clear any blockages | Keep reservoir at proper level; periodic descaling |
| Off taste after cleaning | Residual descaler taste | Extra rinse cycles with fresh water | Fully rinse until taste is neutral |
| Leaks around reservoir | Damaged seals or improper reseal | Inspect seals; reseal deposits | Handle parts gently; follow assembly steps |
Common Mistakes
- Using boiling or hot water in the reservoir, which can damage components
- Skipping the final rinse cycles, leaving residues that affect taste
- Not cleaning the needle or sprayhead, leading to clogs and reduced flow
- Overlooking exterior cleaning; grime can transfer to beverages
Tips For Best Results
- Schedule a quarterly descaling if you use hard water; more often in hard-water areas.
- Always complete the rinse cycle until the water runs clear and tastes neutral.
- Use distilled or filtered water to reduce mineral buildup between cleanings.
- Keep a dedicated cleaning kit handy for quick maintenance between deep cleanings.
Call A Professional
If the brewer shows persistent leaks, electrical problems, or refuses to operate after thorough cleaning, contact Keurig customer support or a qualified appliance technician. Stop using the machine if you notice unusual noises, burning smells, or visible damage to cords or housing.
FAQ
How often should I descale my Keurig?
Descale every 3–6 months, or more frequently if you have hard water or notice slower brew times.
Can I descale with vinegar instead of Keurig descaling solution?
Vinegar is not recommended by Keurig as it can corrode parts or leave odors; use the official descaling products for best results.
Do I need to remove the K-Cup holder during cleaning?
Yes, remove the holder and run a cleaning cycle to reach internal passages, following the kit instructions.
Does cleaning affect coffee flavor immediately?
Yes, a thorough rinse and proper descaling can significantly improve flavor by removing mineral buildup.
Is it safe to use hot water for rinsing?
Use warm or room-temperature water for rinsing; hot water can degrade seals over time.
What if the descaling solution residue remains after rinsing?
Run additional full-water rinse cycles until the solution taste is gone.
Buying Guide
When choosing cleaning and descaling products for a Keurig, consider these factors to ensure effective maintenance and long-term performance.
- <bSize and format: A 20 oz bottle of Keurig descaling solution covers average households, while descaling tablets can be more portable for travel or quick cleans.
- <bDescaling efficacy: Choose products specifically designed for Keurig machines to avoid incompatibilities with internal seals and tubing.
- <bCleaning kit usefulness: A dedicated cleaning kit helps reach needles, sprayheads, and removable components more efficiently.
- <bWater quality: Consider using filtered or distilled water to reduce mineral buildup between cleanings.
- <bMaintenance frequency: If your area has hard water, plan for more frequent upkeep and keep a spare cleaning kit on hand.
- <bCompatibility: Ensure products are labeled for use with coffee makers and compatible with your Keurig model.
- <bPlacement and setup: Place the brewer on a level, dry surface and keep it away from heat sources to avoid performance issues during cleaning.
Ready to keep your Keurig tasting great? With the right descaling solution, a thorough cleaning kit, and a regular maintenance routine, you’ll enjoy consistent brewing performance and better flavors for years to come.
Leave a Reply