How to Clean Window Sills Effectively and Safely
Window sills collect dust, pollen, and grime from daily indoor and outdoor exposure. Proper cleaning helps prevent staining and keeps windows looking bright. This guide covers a practical, step-by-step approach using common household tools and a few specialized items to make the process faster and more thorough.
Quick Answer
Best immediate method: start with a dry dusting, then wipe with a damp microfiber cleaning cloth for windows and sills. For stubborn spots, use an extendable window cleaning brush sill cleaner with soft bristles and finish with a window squeegee with adjustable angle for sills to remove streaks.
What You’ll Need
- Microfiber cleaning cloths for windows and sills – soft, highly absorbent, lint-free
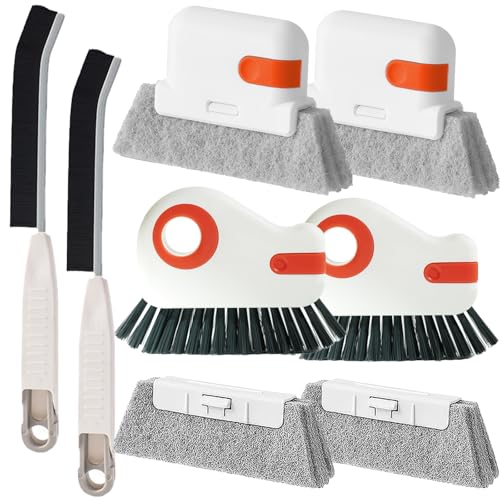
- Extendable window cleaning brush sill cleaner with soft bristles – reaches high or tight spots
- Window squeegee with adjustable angle for sills – for streak-free drying
- All-purpose cleaner or a mild soap solution
- Warm water in a bucket
- Soft sponge or microfiber sponge pad
- Vacuum with crevice tool or a small brush for loose debris
- Protective gloves (optional) and a microfiber towel for drying


Before You Start
Prepare the workspace by removing any plants, decorative items, or electronics near the sill. Lay down a towel or drop cloth to catch drips. Test cleaners on a small, inconspicuous area first to avoid any finish damage. Avoid harsh chemicals on painted or wood sills, which can discolor or warp over time. Plan a cleaning session for 15–30 minutes per window, depending on sill length and depth.
Step-By-Step: How To Clean Window Sills
- Put on gloves if using cleaning chemicals and lay out your towel. Remove loose dust with a dry microfiber cloth or vacuum.
- Dust along the sill edge and corners with the extendable brush cleaner, using soft bristles to avoid scratching.
- Wipe the surface with a damp microfiber cloth to pick up remaining dirt. Rinse the cloth frequently to prevent smearing.
- If there are sticky spots, apply a small amount of all-purpose cleaner to the cloth or a soft sponge and gently scrub in circular motions.
- For tight gaps and crevices, use the brush or a cotton swab lightly dampened with cleaner to dislodge debris.
- For a streak-free finish, run the window squeegee with adjustable angle for sills along the surface, keeping it at a slight angle to collect water toward the edge.
- Wipe the edge and underside of the sill with a dry microfiber cloth to prevent water drainage on flooring or walls.
- Inspect the sill for any remaining stains. Repeat the cleaning and drying steps if needed.
- Dry thoroughly; moisture left behind can encourage mold in damp environments, especially in exterior sills.
- Replace items and tidy the area. Clean tools promptly to extend their life.
- For high or awkward sills, use the extendable tool to reach without climbing and ensure even cleaning across the entire surface.
- Routinely perform a light wipe-down to prevent buildup, especially in homes with pets or heavy dust.
Troubleshooting
| Symptom | Likely Cause | Fix | Prevention |
|---|---|---|---|
| Streaks after cleaning | Drying with a dirty cloth or insufficient rinse | Rinse cloth frequently; rewipe with a clean microfiber | Use a dedicated squeegee for final wipe |
| Water marks on adjacent walls | Excess moisture near edges | Wipe edges dry immediately; use a damp but not soaking cloth | Contain spills with towels |
| Rough texture or stains persist | Deep-seated grime or scuff marks | Apply a gentle cleaner and scrub with a soft sponge | Perform regular maintenance to prevent buildup |
| Finish discoloration on painted wood | Harsh cleaners | Switch to mild soap solution or paint-safe cleaner | Test cleaners first |
Common Mistakes
- Using abrasive pads that scratch the sill surface
- Over-wetting the sill, causing water to seep into walls or flooring
- Overlooking corners and edges where dust accumulates
- Neglecting to dry after cleaning, inviting mold growth
To avoid these issues, select appropriate tools, work in sections, and finish with a thorough dry wipe of the entire sill.
Tips For Best Results
- Use a microfiber cleaning cloth with minimal friction to lift and trap dust instead of spreading it around.
- Operate the extendable window cleaning brush sill cleaner with soft bristles in long, even strokes for uniform coverage.
- Angle the window squeegee with adjustable angle for sills slightly toward the outer edge to guide water away from the window frame.
- Schedule routine cleanings to prevent grime buildup and make each session shorter.
- If you notice persistent staining, test a small area with a milder cleaner before wider use.
Call A Professional
Consider a professional if window sills are severely damaged, peeled paint, or mold growth persists despite cleaning. Seek help immediately if there is visible water damage, structural concerns, or electrical components near the sill area.
FAQ
What cleaner is best for painted window sills?
A mild soap solution or a gentle all-purpose cleaner is usually safest for painted surfaces; avoid harsh chemicals that can strip paint.
Can I use a regular squeegee on window sills?
A window squeegee with adjustable angle is ideal; it reduces streaks and speeds up drying on flat sill surfaces.
How often should I clean interior window sills?
Light maintenance monthly works well for most homes; deep cleaning every 2–3 months is advisable in dust-prone areas.
Is it okay to clean exterior sills with a brush?
Yes, a soft-bristle extendable brush is effective for exterior sills, but rinse with clean water afterward to prevent residue.
Buying Guide
Choosing tools for window sill cleaning depends on sill type, reach, and environmental conditions. Consider size and accessibility of the sill, noise and weight of tools, and storage space. A balanced kit typically includes microfiber cloths, an extendable brush with soft bristles, and a squeegee with adjustable angle. For homes with high windows or difficult access, extendable tools reduce the need for ladders and improve safety. Look for tools with comfortable grips, washable heads, and durable materials to withstand frequent use. Energy efficiency isn’t a major factor here, but selecting compact, reusable cleaning tools saves resources over disposable alternatives. When placing orders, verify compatibility of tool heads with your existing cleaning solutions and consider the availability of replacement parts to prolong tool life.
Want to optimize results? Pair a microfiber cloth with a gentle cleaner and the adjustable angle squeegee for best efficiency. Curious about how this setup compares to a bare sponge? The combination of soft bristles, microfiber, and controlled airflow from the squeegee generally delivers faster, cleaner, streak-free results.
Leave a Reply