How to Clean Nail Tools at Home
Maintaining clean nail tools is essential for hygiene, safety, and professional results. This guide focuses on practical steps to disinfect, refresh, and store manicuring and pedicure instruments using common household methods and purpose-built equipment.
By following a structured cleaning routine, nail tools resist rust, dulling, and bacterial buildup. The method below emphasizes simple, reliable practices that work in home studios, salons, or personal spaces without specialized training.
Quick Answer
Wash tools with warm, soapy water, rinse thoroughly, then disinfect using a UV sterilizer or an ultrasonic cleaner designed for nail tools. Dry completely before storing in a clean, dry container. Inspect tools for damage and replace any that show wear.
What You’ll Need
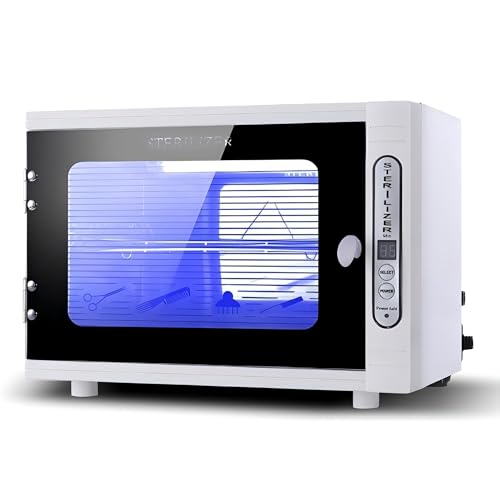
- UV sterilizer for nail tools countertop
- nail tool cleaning brush set stainless steel cleaning kit
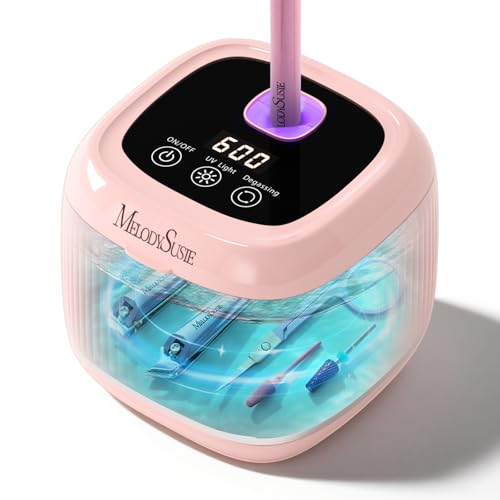
- ultrasonic cleaner for nail tools

Before You Start
Prepare a designated work area with good lighting and a clean, wipeable surface. Wear gloves if you are handling sharp implements. Use lukewarm water and a mild, non-corrosive soap to prevent tool damage. Never place naked blades directly into boiling water or harsh chemicals, as this can dull edges or cause corrosion. Plan a cleaning schedule that fits your routine, allowing time for drying and proper storage.
Step-By-Step: How To Clean Nail Tools
- Separate tools by type (scissors, clippers, cuticle pushers) to avoid cross-contamination.
- Rinse under warm running water to remove visible residues.
- Scrub with a dedicated nail tool cleaning brush set to lift debris from hinges and crevices.
- Wash each piece with mild soap, then rinse until no soap residue remains.
- Use a soft cloth to pat tools dry, then let them air-dry completely on a clean towel.
- Place tools in a UV sterilizer for countertop use or an ultrasonic cleaner for thorough disinfection per device instructions.
- Run the chosen device for the recommended cycle time to kill bacteria and viruses.
- After disinfection, remove tools and dry again if any moisture remains.
- Inspect blades and edges for nicks or corrosion; sharpen or replace damaged tools.
- Store tools in a closed, clean case or drawer to maintain sterility between uses.
- Record a simple cleaning log to track frequency and maintenance actions.
- Sanitize the work area before the next use to prevent recontamination.
Troubleshooting
| Symptom | Likely Cause | Fix | Prevention |
|---|---|---|---|
| Streaks or residues after cleaning | Soap residue or mineral deposits | Rinse thoroughly; use distilled water for final rinse | Keep water clean; dry tools promptly |
| Rust on metal parts | Exposure to moisture; abrasive cleaning | Avoid harsh scrubbing; apply light oil to hinges | Dry completely; store in a dry location |
| Discolored handles or grips | Chemical reactions or prolonged moisture | Wipe with a mild cleaner; dry well | Limit exposure to moisture; rotate tools |
| Edges dull or chipped | Frequent use on hard materials; improper sharpening | Professional sharpening or replacement | Use only appropriate sharpening services |
Common Mistakes
- Using boiling water or harsh solvents that corrode metal and weaken hinges.
- Skipping thorough drying, which invites rust and bacterial growth.
- Overlooking small crevices where debris hides—brush clean those areas thoroughly.
- Ignoring replacement when tools show visible wear or damage.
Tips For Best Results
- Integrate a quick daily wipe-down with a mild disinfectant after each use to maintain hygiene between deeper cleans.
- Keep a dedicated, labeled sanitization station to minimize cross-contamination with other beauty tools.
- When selecting a cleaning device, verify compatibility with the tool materials you own (stainless steel, nickel-plated, etc.).
- Follow manufacturer guidelines for cycle times and recommended cleaning agents to protect tool longevity.
Call A Professional
Seek professional help if tools show persistent rust, structural cracks, or compromised blades that cannot be safely sharpened. If a device (UV sterilizer or ultrasonic cleaner) stops working or leaks fluids, stop using it and contact the manufacturer or a certified technician for servicing.
FAQ
How often should I clean my nail tools?
Clean after each use and perform a deeper disinfection weekly, or more often in shared or salon settings.
Can I use household disinfectants on nail tools?
Only if labeled safe for metal tools; otherwise, prefer device-based disinfection that is designed for nail equipment.
What is the best storage for cleaned tools?
Store in a closed, clean case or drawer lined to prevent moisture exposure and dust.
Is an ultrasonic cleaner necessary for home use?
Not strictly necessary but highly effective for removing debris from hard-to-reach areas; a UV sterilizer is a good alternative for quick disinfection.
Buying Guide
When choosing cleaning and sanitizing equipment for nail tools, consider several factors. Size matters for countertop models that fit your workspace, while noise level can affect comfort in small studios. Look for energy efficiency in ultrasonic cleaners and UV devices to minimize running costs. Controls should be simple, with clear cycle options and reporting. Placement matters: keep devices away from excessive heat, moisture, and clutter. If you share tools with others, prioritize models that offer thorough cycle options and reliable sterilization validation. Compare features like cycle duration, compatibility with stainless steel and other tool materials, and maintenance requirements to ensure you select a system that fits your routine and budget. Do you prefer quick, surface-level disinfection or deeper, tool-through cleaning? A combination of a UV sterilizer for quick disinfection and an ultrasonic cleaner for thorough debris removal often provides balanced results for most home setups.
Leave a Reply