How to Clean Swamp Cooler Pads in a Window or Whole-House Evaporative System
Swamp cooler pads, or evaporative cooler pads, are the core component that cools air by absorbing water and releasing it through a pad. Over time, minerals, dust, and algae can build up, reducing efficiency and airflow. This step-by-step guide explains a safe, effective method to clean pads or prepare for replacement, using common tools and a few specialty items from the listed product keywords.
Maintaining clean pads helps your evaporative cooler run cooler and more efficiently, lowering energy use and extending the unit’s life. The process is straightforward but requires attention to safety, especially when handling cleaning solutions and working around water. Follow the steps below to restore performance without damaging the pads or the cooler.
Quick Answer
Quick Method: Turn off and unplug the unit, remove the pads, rinse with clean water, spray with a mild cleaning solution, scrub gently with a dedicated brush, rinse again, and reinstall. If pads show wear or mineral buildup remains, replace with the correct size cellulose evaporative cooler replacement pads.
What You’ll Need
- evaporative cooler pad cleaning brush
- 20×14 inch cellulose evaporative cooler replacement pad
- evaporative cooler pad cleaning solution spray bottle
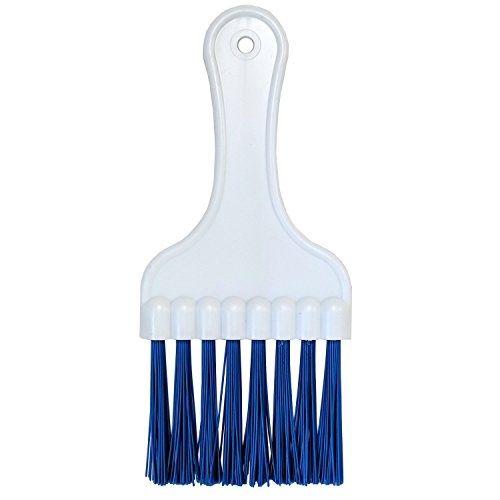


Before You Start
Before beginning, unplug the unit and shut off the water supply to avoid accidental sprays. Remove the pads carefully to prevent tearing, especially if they’re old or brittle. Work in a well-ventilated area and wear gloves to minimize contact with mineral-rich water. Estimate a 45–90 minute window for typical cleaning and replacing, depending on pad condition and access to the unit. Important: do not use harsh cleaners that could degrade the pad material or leave residues that hinder absorption.
Step-By-Step: How To Clean Swamp Cooler Pads
- Access the pad assembly by opening the cooler housing and removing the protective grate if present.
- Gently lift out the evaporative cooler pads, inspecting for tears or significant mineral buildup.
- Rinse pads with lukewarm water from a hose or utility sink to remove loose dust and debris. Do not twist or wring hard, which can damage cellulose fibers.
- Prepare a mild cleaning solution using the evaporative cooler pad cleaning solution spray bottle per label instructions, applying lightly to the pad surface.
- Use the evaporative cooler pad cleaning brush to scrub the pad’s surface in a gentle, back-and-forth motion, focusing on mineral-streaked areas.
- Rinse the pads thoroughly again with clean water to remove all soap or residue. Ensure no cleaning solution remains in the pores of the pad.
- Inspect for mineral deposits or algae growth. If stubborn stains persist, repeat the spray and light scrub, then rinse again.
- Let pads air-dry completely in a shaded area before reinstalling. If drying takes too long, you can set the unit with the water off and the fan running to speed evaporation.
- Reinstall pads in their correct orientation, replace any gaskets or seals, and reassemble the housing. Turn the water supply back on and test the unit at low fan speed to verify air flow and humidity output.
- Run the cooler for a short period, then check for any leaks or unusual noises. If water overflows or pads remain damp, check the pad alignment and seals and adjust as needed.
- Schedule regular maintenance, replacing pads every season or according to mineral hardness and unit usage. Keep spare 20×14 inch cellulose evaporative cooler replacement pads on hand for quick changes during peak heat.
Troubleshooting
| Symptom | Likely Cause | Fix | Prevention |
|---|---|---|---|
| Weak airflow after cleaning | Pads not seated properly or debris left in the path | Re-seat pads; rinse area again and remove any lint | Inspect pads during installation, ensure tight fit |
| Persistent mineral streaks on pads | Hard water deposits | Repeat cleaning cycle with more thorough rinsing | Use softened water if possible; clean more frequently |
| Pad tearing during removal | Old, brittle pads | Handle gently; replace with new pads | Replace annually or as needed |
| Water leaks around pad area | Improper seal or misaligned pad | Check gaskets, reseat pad | Inspect seals when cleaning pads |
Common Mistakes
- Using harsh cleaners that degrade cellulose pads
- Scrubbing too aggressively, causing fiber damage
- Reusing old pads with heavy mineral buildup
- Rinsing with hot water which can warp materials
Taking a measured approach helps extend pad life and keeps the evaporative cooler running efficiently. Always align pads correctly to prevent airflow restrictions.
Tips For Best Results
- Clean pads at the start of the cooling season and after extended inactivity to prevent mineral buildup.
- Use a dedicated pad cleaning brush to avoid lint transfer from other cleaning tools.
- Keep spare 20×14 inch cellulose evaporative cooler replacement pads on hand for quick changes during hot months.
- Check the support frame and seals for wear—damaged components can reduce cooling efficiency.
- Consider using softened water if your supply has very high mineral content to minimize scale formation.
Call A Professional
Stop and call a pro if you notice persistent leaks, unusual noises, electrical concerns, or if pads continue to underperform after cleaning and replacement. Do not attempt major electrical repairs yourself, and avoid operating the unit if water is pooling around electrical connections or control housings.
FAQ
How often should swamp cooler pads be cleaned?
Clean pads at the start of the cooling season and after heavy use in hot months to maintain efficiency.
Can I clean pads without removing them?
Light cleaning can be done in place, but removing pads allows for a thorough rinse and brushing.
What if my pads are damaged?
Replace with the correct size cellulose evaporative cooler replacement pads to restore performance.
Are mineral deposits harmful to the unit?
Yes, heavy mineral buildup reduces airflow and cooling efficiency; regular cleaning helps prevent damage.
Buying Guide
When buying replacement pads or accessories, consider size compatibility with your evaporative cooler, the pad material, and the expected mineral content of the water supply. Look for a pad that fits your model’s dimensions, such as 20×14 inches if that is your unit’s specification. Noise level and energy efficiency are largely driven by pad quality and how well the pad is seated—proper fit reduces resistance and fan load. Energy-star style claims are less common for pads themselves, but choosing high-absorbency cellulose pads can improve cooling efficiency. For placement, ensure pads are accessible for replacement and that the housing allows for easy airflow without obstructions. If you are balancing purchase cost with maintenance frequency, copying the exact pad size and material from your current setup often yields the best long-term value. If uncertain, consult the unit’s manual or a service professional to avoid improper fit and potential leaks.
Leave a Reply