How to Clean a Hot Tools Hair Dryer Brush and Similar Hot Tools
Maintaining a clean hot tools setup is essential for performance, longevity, and healthy styling. Over time, product buildup, oil, and hair residue can reduce efficiency and even irritate the scalp if reused without cleaning. This guide walks through practical steps to clean a Hot Tools hair dryer brush and comparable heat styling tools, using common cleaning supplies and avoiding damage to delicate components.
Quick Answer
Turn off and unplug the tool, remove attachments, wipe with a damp cloth, and use a soft brush or cotton swab to clean bristles and vents. For stubborn buildup, apply a small amount of rubbing alcohol or mild cleaner on a cloth, then rinse and dry completely before reuse.
What You’ll Need
- Hot Tools hair dryer brush cleaning brush
- Heat styling tool cleaning kit for brushes and irons
- Hair dryer brush cleaner brush set
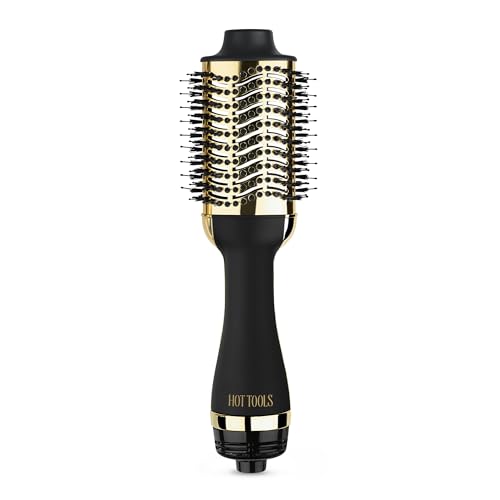


Before You Start
Safety first: unplug the tool and allow it to cool completely before handling. Remove any attachments or brushes if present. Work in a well-lit area and on a non-slip surface. Check the user manual for specific disassembly guidance to avoid voiding warranties. Time estimate: 10–20 minutes for a thorough clean.
Cautions: Avoid submerging electrical components in water. Do not use harsh solvents on plastic housings. If the tool shows exposed wiring or overheating signs, stop using it and seek professional service.
Step-By-Step: How To Clean A Hot Tools Hair Dryer Brush
- Unplug and cool: Ensure the device is fully powered down and cool to touch before disassembly.
- Detach accessories: Remove any brush heads, concentrators, or combs per the user manual.
- Wipe the exterior: Use a damp microfiber cloth to wipe the housing and surfaces. Dry with a clean cloth to avoid water entering vents.
- Clean brush bristles: Use the cleaning brush to gently sweep lint and hair from the bristles. For stubborn buildup, dampen the tip slightly and wipe, avoiding any moisture near the electrical components.
- Vent and filter care: If the unit has vents or filters, use a dry brush or compressed air to remove dust. Do not blast metal parts with moisture.
- Spot-clean with alcohol: Dampen a cotton swab with rubbing alcohol and clean around the bristle base and vent areas. Let dry completely before reassembling.
- Clean attachment posts: Wipe the attachment connectors with a lightly damp cloth, ensuring they are completely dry before reattaching.
- Reassemble and test: Put all parts back, plug in, and run a brief low-heat test to ensure proper operation and no residue is released.
- Routine maintenance: Perform a quick wipe after each use and a deep clean monthly, depending on frequency of styling.
- Store properly: Keep the tool in a clean, dry place, preferably in a protective case to reduce dust buildup.
- Disposal of damaged parts: If any component appears warped or cracked, replace it rather than attempting a risky repair.
- Documentation: Note the date of cleaning to maintain a regular maintenance schedule for the device.
Troubleshooting
| Symptom | Likely Cause | Fix | Prevention |
|---|---|---|---|
| Tool runs but feels weak or hot spots | Clogged vents or battered bristles | Deep clean vents and replace damaged attachments | Clean monthly; inspect for wear |
| Unusual odors after cleaning | Residual cleaning agent | Wipe with a dry cloth and run in a cool cycle | Use minimal cleaners and fully dry |
| Blowing air with no heat | Internal sensor or heater buildup | Consult manual or professional service if persists | Regular maintenance to prevent buildup |
| Inconsistent heat output | Loose connections or dirty contacts | Check attachments and clean contacts | Avoid moisture near electrical parts |
| Bristles shedding or warping | Excessive heat exposure | Replace the brush head | Use appropriate heat settings and avoid touching metal parts |
Common Mistakes
- Over-wetting the device or submerging it in liquids
- Using harsh solvents that can damage plastic housings
- Forgetting to dry parts thoroughly before reassembly
- Ignoring vent clogs, leading to overheating
- Disregarding warranty guidelines for disassembly
Keeping a regular cleaning cadence helps prevent these issues and extends tool life.
Tips For Best Results
- Clean immediately after use to prevent residue from sticking hard to bristles and vents.
- Use the cleaning brush included in the kit to reach tight spaces safely.
- Label attachments so they align correctly after cleaning.
- Whenever possible, use low to medium heat during reassembly tests to avoid heat shock.
- Store in a cool, dry place; avoid humidity that promotes mold or corrosion on metal parts.
Call A Professional
Stop using the tool if you notice frayed cords, scorching smells, smoke, or unusual noises. If cleaning does not restore full function, or if moisture has entered the internal housing, contact a qualified technician or the manufacturer’s service center for inspection and repair.
FAQ
How often should I clean a hot tools hair dryer brush?
Clean the tool after every few uses for light maintenance, and perform a deeper cleaning monthly or as needed based on usage.
Can I use water to clean the attachments?
Only use moisture away from electrical parts. Use a damp cloth on non-electrical surfaces and avoid soaking attachments.
What if the brush head is damaged after cleaning?
Replace the brush head to prevent shedding into hair and protect the device’s performance.
Is it OK to use rubbing alcohol on all parts?
Rubbing alcohol can be used on non-plastic surfaces and around metal areas, but avoid prolonged exposure on delicate plastics and ensure complete drying before reuse.
Should I lubricate any moving parts?
No lubrication is typically required; refer to the user manual for any specific guidance about bearings or gears.
What is a quick test to confirm proper cleaning?
Reassemble, plug in, and run the device on a cool, low setting for a minute to confirm airflow and lack of odors before normal use.
Are there warranty considerations for cleaning?
Yes—always check the warranty terms before disassembly or using cleaners, to avoid voiding coverage.
Buying Guide
Choosing the right cleaning approach for hot tools like a hair dryer brush involves more than just removing buildup. Consider size, noise level, energy efficiency, controls, and placement in your grooming space to optimize performance and convenience.
- <strongSize and weight: Smaller, lighter tools are easier to maneuver during daily styling and cleaning operations.
- <strongNoise level: Quieter operation reduces disruption, especially in shared living spaces or late-night routines.
- <strongEnergy efficiency: Efficient models maintain temperature with less heat fluctuation, aiding safe cleaning cycles without overworking the heater.
- <strongControls: Simple, intuitive controls help avoid accidental changes during cleaning or routine use.
- <strongPlacement: Store neatly in a ventilated, dry area with an accessible cleaning kit to streamline maintenance.
When evaluating a cleaning kit for brushes and irons, look for compatible items that match your tool’s model and attachments. A comprehensive heat styling tool cleaning kit for brushes and irons or a hair dryer brush cleaner brush set often provides a set of brushes, cleaning swabs, and non-abrasive cleaners designed for safe use with hot tools. If you own multiple devices, ensure the kit includes universal-compatible components to simplify maintenance across all tools.
Leave a Reply