How to Clean Car Vents: A Practical Guide
Dust, debris, and musty odors can accumulate in a vehicle’s vents, reducing air quality and cooling efficiency. Cleaning car vents regularly helps improve airflow, keep the HVAC system from working harder, and extend the life of interior components. This guide provides a clear, practical method that works with common tools and car interiors.
Whether you drive a compact sedan or a spacious SUV, keeping the vent pathways clear is part of routine maintenance. The steps below emphasize safe handling and do-it-yourself methods that minimize disruption to your daily schedule.
Quick Answer
What you’ll do: remove loose dust, use targeted tools to reach narrow openings, and finish with a thorough wipe and careful testing of the HVAC system. Expect about 20–40 minutes for a thorough passenger-car cleaning, longer for larger vehicles or deeper reseating of dust.
What You’ll Need
- Extendable microfiber vent brush for car interior
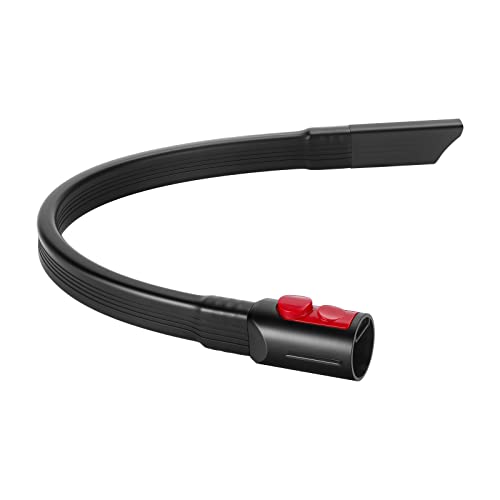
- Slim crevice vacuum with car vent attachment
- Compressed air duster for cleaning car vents


Before You Start
Prepare a clean work area, and ensure the vehicle is off with the keys out of the ignition. Open all doors to improve ventilation during the cleaning process. For safety, avoid spraying liquids directly into vents and wear a mask if you are sensitive to dust. Time estimate: 20–60 minutes depending on ventilation system complexity and whether you plan a full interior detail alongside vent cleaning.
Step-By-Step: How To Clean Car Vents
- Turn off the vehicle and unplug any external power sources from multimedia components to prevent accidental activation during cleaning.
- Open all dash vents as wide as possible to expose the pathways. This helps dust fall away rather than get pushed deeper inside.
- Use the extendable microfiber vent brush to sweep along each vent blade, collecting loose dust on the brush fibers.
- Switch to the slim crevice vacuum with car vent attachment and carefully vacuum the vent openings, moving slowly to avoid dislodging delicate parts.
- Hold the vacuum tip close to the vent intake and use short, steady passes to pull dust from deeper channels.
- Apply a short burst of compressed air duster into each vent to dislodge stubborn debris. Keep the can upright and use brief bursts to prevent moisture buildup.
- Wipe the vent surfaces with a clean microfiber cloth to remove any remaining residue and catch loosened dust.
- With vents closed, run the HVAC on high for a few minutes with the recirculation mode off to test airflow and ensure debris is cleared. Listen for any unusual noises that may indicate a blockage.
- Inspect the cabin air filter (if accessible) and replace it if it appears dirty or clogged. A clean filter supports healthier airflow and allergen control.
- Reopen vents and perform a final pass with the brush or vacuum if you notice new floating dust. A second pass often removes stubborn particles.
- Clean surrounding dashboard areas to finish the job. Touch-up any areas where dust collected on surfaces near vents.
Troubleshooting
| Symptom | Likely Cause | Fix | Prevention |
|---|---|---|---|
| Weak airflow after cleaning | Blockage deeper in the ductwork | Re-run the vacuum and use compressed air in short bursts from multiple angles | Clean vents regularly, replace cabin air filter on schedule |
| Unusual noises when HVAC runs | Debris caught in vents or loose components | Inspect visible areas with a brush; avoid forcing items through narrow openings | Use gentle cleaning tools and avoid overpacking debris |
| Persistent musty smell | Mold or moisture buildup inside ducts | Replace or clean cabin air filter; consider professional mold remediation if persistent | Keep interior dry, run HVAC on fresh air mode periodically |
| Dust returns quickly after cleaning | Vent seals or ducts retain debris | Recreate a full interior detail later and re-check seals | Frequent light cleanings instead of infrequent deep cleans |
Common Mistakes
- spraying liquids directly into vents, which can damage internal components
- forcing tools into tight openings, risking breakage of vanes or sensors
- neglecting the cabin air filter, which can negate cleaning efforts
- skipping a test run after cleaning, missing airflow or smell issues
Tips For Best Results
- Clean vents during a low-humidity day to minimize moisture-related issues.
- Work with a well-lit area to spot dust in narrow gaps.
- Use an extendable brush to reach behind thicker dash components without dismantling panels.
- Schedule a routine vent cleaning every 6–12 months, depending on driving environment.
- Keep a dedicated microfiber cloth near your cleaning tools for better dust capture.
Call A Professional
Consider contacting a pro if you notice persistent odors, visible mold growth inside the ducts, or airflow issues that persist after cleaning. If you hear grinding noises, rattling, or the system fails to blow air at all, seek immediate professional assessment to avoid further damage.
FAQ
What tools are essential for cleaning car vents?
Essential tools include an extendable microfiber vent brush, a slim crevice vacuum with a vent attachment, and a compressed air duster to dislodge stubborn debris.
How often should I clean car vents?
Most drivers benefit from a light cleaning every 3–6 months and a deeper vent cleaning annually, depending on the environment and usage.
Can I clean vents without removing the cabin air filter?
Yes, but replacing the filter when dirty improves airflow and reduces dust recirculation.
Is compressed air safe for car vents?
When used in short bursts and held at a safe distance, compressed air helps remove dust without moisture, reducing risk to sensitive components.
Buying Guide
Choosing the right tools for cleaning car vents involves evaluating convenience, effectiveness, and vehicle compatibility. Consider the following factors to select a kit that fits your needs.
Size and reach
Look for an extendable vent brush that can reach difficult angles and deep duct passages. A slim vacuum attachment should fit multiple vent shapes without requiring disassembly.
Noise level and power
When using a vacuum or air duster, a quieter option reduces disturbances, especially in small cabins. Choose models with adjustable or moderate suction and controlled air bursts.
Energy efficiency and ease of use
Battery-powered handheld tools offer portability but check battery life. For routine maintenance, corded or rechargeable devices with simple controls are ideal.
Controls and versatility
Tools that attach securely to vents and have interchangeable heads provide versatility across different vehicle interiors.
Placement and storage
Opt for compact, lightweight tools that fit in a glove compartment or center console. A dedicated cleaning kit keeps tools organized and ready for use.
Compatibility with vehicle types
Ensure the tools are suitable for your car’s vent design, whether it’s a compact sedan or a larger SUV. Check for flexible heads and universal attaches.
Maintenance and replacements
Consider how easy it is to clean and maintain the tools. Replacing worn brushes or filters should be straightforward and affordable.
Leave a Reply