How to Clean a Keurig Coffee Maker
Keeping a Keurig running smoothly helps maintain optimal flavor and extends the appliance’s life. This guide covers a practical, step-by-step approach to cleaning your Keurig using common cleaning products and tools designed for coffee makers.
Quick Answer
Descale the brewer to remove mineral buildup, then clean removable parts with Keurig cleaning tablets. Use a needle cleaning brush to clear the K-Cup needle and rinse thoroughly between steps to prevent coffee residue from affecting flavor.
What You’ll Need
- Keurig descaling solution kit
- Keurig coffee maker cleaning tablets
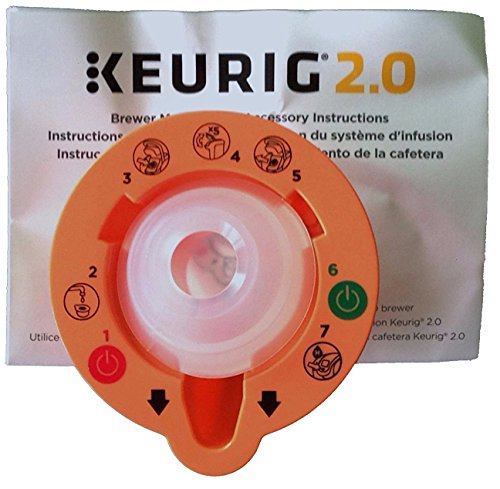
- Keurig needle cleaning brush


Before You Start
Unplug the Keurig before disassembly. Empty the water reservoir and run a few empty cycles with water only to flush old coffee oils. For descaling, use the manufacturer’s recommended descaler and follow the kit instructions. Safety note: avoid using abrasive cleaners on the exterior or interior components. If your brewer is still under warranty, consult the manual before using third-party cleaning agents.
Step-By-Step: How To Clean A Keurig
- Unplug and remove the water reservoir, then detach any removable parts per the user manual.
- Pour the entire bottle of Keurig descaling solution into the reservoir and fill the rest with water as directed by the kit.
- Run Brew cycles without a K-Cup until the reservoir is empty, discarding the collected liquid.
- Rinse the reservoir, refill with fresh water, and run multiple clean-water cycles to flush the system.
- Detach the K-Cup needle area and use the Keurig needle cleaning brush to remove any coffee grounds or mineral buildup.
- Reassemble the machine and run two or three additional clean water cycles to ensure all cleaner residue is flushed.
- Place a sanitation tablet in the removable filter area if your model supports it, and run a cleaning cycle as directed by the tablet’s instructions.
- Wipe down the exterior and removable components with a damp cloth, then dry before reassembly.
- For ongoing maintenance, perform a light rinse weekly and a full descale every 1–3 months depending on usage and water hardness.
- Test brew with a few plain cups of water to confirm no cleaner taste remains before brewing coffee for consumption.
- Store the machine in a dry place with the reservoir firmly sealed when not in use.
Troubleshooting
| Symptom | Likely Cause | Fix | Prevention |
|---|---|---|---|
| Weak or no water flow | Clogged needle or mineral buildup | Use needle cleaning brush; descale again if needed | Regular descaling schedule |
| Residue taste after cleaning | Cleaner residue left in system | Run additional clean-water cycles | Rinse thoroughly during each maintenance |
| Leakage during brewing | Damaged seals or loose parts | Inspect seals; reseat removable components | Avoid overtightening connectors |
| Unusual noises | Residual cleaning agents or mineral buildup | Complete an extra descale cycle | Use filtered water if possible |
Common Mistakes
- Skipping the descaling step or using just water without a cleaner when mineral buildup is present.
- Forgetting to rinse thoroughly after any cleaning agent, which can affect flavor.
- Using abrasive tools on the exterior or interior surfaces.
- Ignoring model-specific instructions for needle access or removable parts.
Tips For Best Results
- Use filtered or bottled water if your tap water is hard to reduce mineral deposits.
- Schedule maintenance based on usage: higher volume users should descale more often.
- Maintain a regular routine: a brief weekly rinse keeps flavors clean between deeper cleanings.
- Keep a spare reservoir seal or gasket on hand to replace worn parts quickly.
Call A Professional
Stop and seek professional assistance if you notice persistent leaks, electrical issues, or odors after cleaning. Do not disassemble electrical components beyond the manufacturer’s guidance, and contact customer support or a qualified appliance technician if problems persist.
FAQ
How often should I descale my Keurig?
Most users descale every 1–3 months, depending on water hardness and usage.
Can I use other descaling products?
It is best to use the Keurig descaling solution kit or a product specifically approved by Keurig for your model.
Is it safe to use cleaning tablets?
Yes, cleaning tablets are designed for Keurig machines to clean the internal passageways and maintain performance.
What should I do if the needle is clogged?
Use the Keurig needle cleaning brush to gently remove debris, and repeat the cleaning cycle after clearing the blockage.
Buying Guide
When choosing cleaning and descaling supplies for a Keurig, consider several factors to ensure optimal performance and longevity.
Key Buying Factors
- Size and compatibility: Confirm the kit or tablets are compatible with your specific Keurig model.
- Descaling strength: Look for kits that address mineral buildup seen with your water hardness.
- Ease of use: Prefer products with clear instructions and minimal steps for repeat maintenance.
- Parts and tools included: A cleaning brush, descaling solution, and cleaning tablets cover common maintenance needs.
- Effect on flavor: Choose products designed to rinse cleanly with no aftertaste when used as directed.
When comparing options, think about your usage—light daily use may require less frequent descaling, while high-volume households benefit from a proactive maintenance plan. Do you want a comprehensive kit that combines descaling and needle cleaning, or separate items for flexibility? Also consider water softness in your area, as it influences mineral buildup and cleaning frequency.
Leave a Reply