How to Get Rid of Static Sound in a Microphone
Low-noise audio is essential for clear recordings and performances. Static sounds from a microphone can stem from grounding issues, cable quality, or interference. This guide focuses on practical steps to reduce or eliminate static using common mic setups and reliable components.
Quick Answer
Isolating the microphone from ground loops and EMI starts with proper cables and simple inline devices. Use a shielded, low-capacitance XLR cable to minimize interference, consider a ferrite choke to suppress high-frequency noise, and apply a ground loop isolator if a hum or static persists between gear. Always verify connections, testing each component individually to identify the source of the static.
What You’ll Need
- XLR microphone cable shielded low capacitance 6ft
- ferrite choke microphone cable
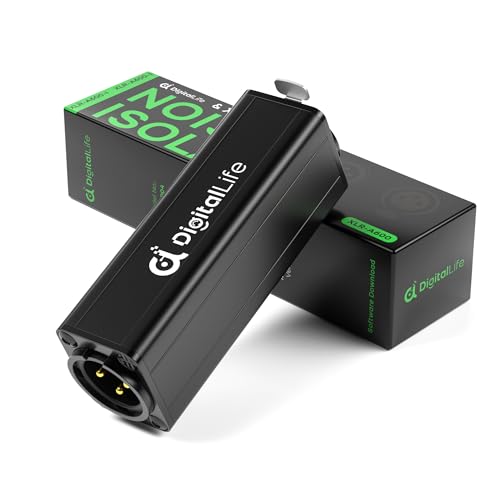
- XLR microphone ground loop isolator


Before You Start
Assess the current setup and plan a stepwise approach. Check for loose connections, damaged cables, or exposed wiring. Ensure the microphone is properly grounded, but not connected to multiple grounds that could form a loop. Have a clean, dry workspace and avoid using high-power electrical devices near the audio gear. Important caution: Do not bypass safety grounds or work with energized equipment without disconnecting it from power.
Time estimate: 15–45 minutes for a full test and replacement path. If static persists after the basic checks, allocate extra time for component testing or professional help.
Step-By-Step: How To Eliminate Microphone Static
- Inspect all cables for visible damage. Replace any frayed or kinked cables with a shielded low-capacitance XLR cable to reduce interference.
- Unplug the entire signal chain and re-connect gradually. Start with the microphone and a single cable to the mixer or audio interface to confirm clean baseline sound.
- Use a ferrite choke on the mic cable near the source or at the interface. This helps suppress high-frequency RF noise that can manifest as static.
- Ensure the mic is properly grounded but not creating a ground loop. If you hear hum or buzz, try lifting the ground with a ground loop isolator between the interface and the mic or between stages of the chain.
- Test each connection point (mic to cable, cable to interface, interface to monitor) individually. Replace any suspect connector or tighten loose jacks to ensure solid contact.
- Consider using a high-quality shielded cable for the entire path. Shielding reduces ambient electronics and EMI coupling into the signal path.
- Place the setup away from electrical devices that emit strong RF fields (computers, routers, power supplies) and keep metal cases for the interface grounded and stable.
- If dynamic mic handling or proximity to other devices causes pops or static, try a different mic position or use a pop filter and isolation shield to reduce mechanical noise.
- Test with and without phantom power if using condenser mics. In some cases, phantom power interaction with certain preamps can introduce noise.
- Document each change and perform a controlled test recording to verify the improvement after each step.
- Finalize the setup with the combination that provides the cleanest signal and least noise floor during typical use.
Troubleshooting
| Symptom | Likely Cause | Fix | Prevention |
|---|---|---|---|
| Persistent static after changes | Ground loop or EMI not fully addressed | Insert XLR ground loop isolator and confirm shielding continuity | Keep cable routing away from power lines or EMI sources |
| Hum when plugging in microphone | Ground loop between interface and mixer | Test isolation strip or change grounding path | Use single, common ground for all gear |
| Buzz with condenser mic | phantom power interaction or preamp noise | Toggle phantom power, test with different preamp | Dedicated preamp with clean supply |
| Static when moving mic or cable | Cable wear or loose connectors | Replace damaged cable; secure connectors | Use strain reliefs and proper cable management |
| RF interference from wireless devices | Proximity to RF transmitters | Reposition gear; add ferrite choke | Avoid near wireless transmitters during recording |
Common Mistakes
- Using non-shielded or high-capacitance cables in professional setups
- Assuming all static is from the mic; sometimes the interface or mixer path introduces noise
- Overlooking simple grounding issues in multi-device rigs
- Relying on a single solution without testing each component
Tips For Best Results
- Prefer XLR microphone cables with strong shielding and low capacitance to preserve high-frequency response
- Keep power cables separate from audio cables to reduce cross-talk and EMI
- Route cables away from fluorescent lights or transformers, which can emit RF noise
- Label and organize cables to simplify future troubleshooting
- Consider a higher-quality ground loop isolator if static recurs in complex rigs
Call A Professional
Seek professional help if static persists after trying the recommended fixes, especially in complex installations or critical live environments. Stop using gear that presents electric shock risks, signs of heat, or audible crackling that worsens with use. If unsure about safety steps or electrical modifications, contact a licensed audio technician or an electrician.
FAQ
What causes static in a microphone?
Static can be caused by grounding issues, EMI from nearby electronics, damaged cables, or improper shielding in the signal path.
Do ferrite chokes really help with mic noise?
Yes, ferrite chokes reduce high-frequency interference in the mic cable, which often manifests as static or hiss.
Should I always use a ground loop isolator?
Not always, but they are helpful when a ground loop creates hum or buzz. Test to confirm if static improves.
Is it safe to adjust phantom power for a condenser mic?
Phantom power can interact with some preamps; test with and without it to determine if it contributes to noise.
Buying Guide
When selecting gear to reduce microphone static, consider size, noise performance, energy efficiency, controls, and placement. A shielded XLR cable with low capacitance helps preserve signal quality in long runs, while a ferrite choke provides additional RF suppression without affecting audio dynamics. A ground loop isolator offers a practical solution for stubborn hums between devices, especially in complex studio rigs. For placement, keep cables off the floor, away from magnetic or RF sources, and use cable management to minimize movement and wear. Compare products based on shielding effectiveness, conductor quality, and compatibility with your interface. Ultimately, the right combination reduces static, improves clarity, and yields a more reliable microphone setup.
Leave a Reply