How to Clean a Freezer Floor
Cleaning a freezer floor keeps your appliance hygienic and operating efficiently. A little routine care prevents frost buildup, odors, and spills from becoming stubborn messes. This guide walks through simple, safe steps to refresh the bottom surface of your freezer with common tools that are gentle on interiors.
Quick Answer
Unplug the freezer, remove items, and defrost if needed. Use a combination of a scraper or non-scratch brush for stubborn ice, a nylon scrub brush for tight spots, and a microfiber cloth to wipe away moisture. Dry completely before returning items and plugging back in.
What You’ll Need
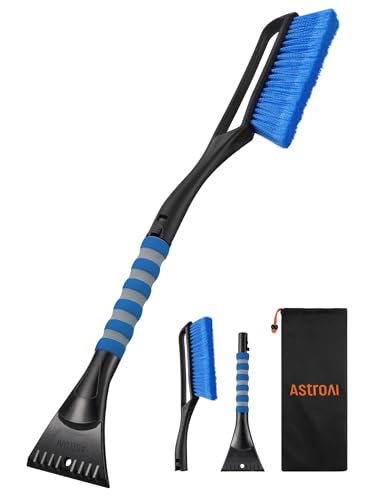
- ice scraper with brush for appliance cleaning
- non-scratch nylon scrub brush for freezer interior
- microfiber absorbent cleaning cloth for freezer spills


Before You Start
Before you begin, unplug the freezer and remove all food. If your unit is frost-free, switch to the defrost setting if available. Place towels on the floor to catch any drips and protect surrounding surfaces. Time estimate: 15–30 minutes for light cleaning, 45–60 minutes for a thorough scrape and wipe-down. Do not use sharp metal tools that could damage flooring or interior surfaces. Keep kids and pets away during the process.
Step-By-Step: How To Clean A Freezer Floor
- Empty all items from the freezer and set them in a cooler if needed to keep them cold.
- Unplug and remove any shelves or drawers to access the floor more easily.
- Use the ice scraper with brush for appliance cleaning to loosen compacted ice along the floor’s edges.
- For stubborn ice patches, apply a small amount of warm water and gently scrape again. Avoid hot water that can cause cracks or damage.
- Dip the non-scratch nylon scrub brush for freezer interior into warm, soapy water and scrub the floor in a gentle, circular motion to lift grime.
- Wipe up loosened debris with the microfiber absorbent cleaning cloth for freezer spills, squeezing out as needed to prevent puddles.
- If there are lingering odors, wipe with a mild solution of water and baking soda, then rinse with a clean cloth.
- Dry the entire floor thoroughly with a fresh microfiber cloth to prevent moisture buildup before reinserting shelves and food.
- Replace shelves and drawers, plug the unit back in, and wait for the freezer to reach the appropriate temperature before restocking.
- Inspect for any remaining damp spots. If found, repeat drying steps and ensure complete moisture removal.
- Schedule regular cleaning to prevent buildup and extend the life of the appliance.
- Keep a small dedicated cleaning kit handy to simplify future sessions.
Troubleshooting
| Symptom | Likely Cause | Fix | Prevention |
|---|---|---|---|
| Ice reinsulates quickly after cleaning | Residue or moisture left on floor | Re-clean with a dry microfiber cloth and ensure full drying | Dry thoroughly after each clean; avoid leaving damp surfaces |
| Strong odor persists | Food residues or spilling liquids | Wipe with mild baking soda solution; rinse and dry | Store food in sealed containers; wipe spills promptly |
| Scrubbing leaves scratches | Harsh or abrasive tools | Switch to non-scratch nylon brush and gentle pressure | Use appropriate tools designed for appliance interiors |
| Floor remains damp | Incomplete drying | Increase air circulation, use towels to absorb moisture | Dry thoroughly and keep door open briefly after cleaning |
Common Mistakes
- Using metal scrapers that can gouge plastic floors or seams
- Applying excessive heat or hot water that may warp components
- Leaving moisture on the floor for extended periods
- Forgetting to unplug or to remove shelves before cleaning
Tips For Best Results
- Keep the microfiber absorbent cleaning cloth for freezer spills handy to quickly mop up any drips as you work.
- Use a non-scratch nylon scrub brush for freezer interior for safe scrubbing without scratching surfaces.
- Lightly mist water or a mild soap solution rather than pouring liquid directly on the floor.
- Work in small sections to avoid spreading dirty water across already-cleaned areas.
- Periodically check door seals during cleaning; a tight seal helps maintain efficiency after restocking.
Call A Professional
Consider consulting a professional if you notice persistent frost buildup after cleaning, unusual noises, or if the freezer is not cooling correctly. If the interior shows cracks, leaks, or any signs of electrical issues, stop using the unit and contact a technician promptly.
FAQ
Can I use bleach on a freezer floor?
Bleach is generally not necessary and can be harsh on plastic interiors. Use mild soap and water or a baking soda solution for odors and stains.
How often should I clean the freezer floor?
Clean the floor during regular defrost cycles or every 1–3 months, or sooner if spills occur.
Is it okay to leave water on the floor after cleaning?
No. Dry the area completely to prevent ice formation and contamination.
What if there is a strong odor after cleaning?
Rewipe with a baking soda solution or a diluted vinegar rinse, then dry thoroughly before restocking.
Do I need to unplug during quick wipe-downs?
For safety and to avoid food spoilage, unplug during deep cleaning; for quick surface wipe-downs, ensure the unit is cool and stable.
Buying Guide
When choosing cleaning tools for a freezer floor, consider size and ergonomics, especially if the freezer compartment is tight. Noise level may matter if the unit is near living spaces; a compact, handheld scrub brush is typically quiet and easy to maneuver. Energy efficiency relates more to the freezer as a whole, but choosing tools that reduce cleaning time helps minimize exposure to warm room temperatures. Look for adjustable handles on brushes to reach under racks, and pick a microfiber cloth with strong absorption to minimize soggy cleanup. For best results, select tools that are designed for appliance interiors and safe for plastic, chrome, and rubber seals.
Leave a Reply