How to Clean a Keurig Coffee Maker Safely and Effectively
Maintaining a Keurig coffee maker ensures a consistent brew, optimal flavor, and equipment longevity. Regular cleaning helps prevent clogs, mineral buildup, and stale-tasting coffee. This guide lays out a practical, step-by-step approach using common household tools and reliable descaling products.
Quick Answer
Run a Keurig descaling solution through the machine according to the product instructions, then run several clean water cycles to rinse. Use a Keurig cleaning kit for a thorough refresh, including descaler and brush, and address any stubborn buildup with a needle cleaning brush kit if needed.
What You’ll Need
- Keurig descaling solution for coffee maker 32 oz
- Keurig cleaning kit for coffee maker including descaler and brush
- Keurig coffee maker needle cleaning brush kit
- Clean water (bottled or filtered)
- Soft cloth or sponge for exterior wiping


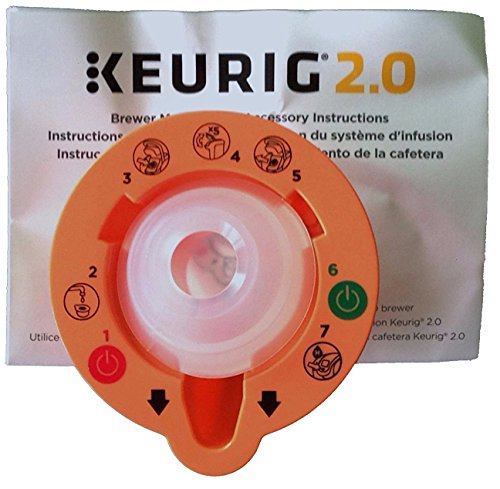
Before You Start
Unplug the brewer and remove any K-Cups or the drip tray to access all areas. Descale every 3–6 months depending on mineral content in your water; more frequent descaling may be necessary in hard water regions. Do not use vinegar unless specified by Keurig, as it can leave flavors and potentially harm components. Allow the machine to cool briefly if it’s recently used and avoid using harsh cleaners on the exterior. Budget time for multiple rinse cycles to ensure all residue is removed; plan for about 30–60 minutes overall, including drying time.
Step-By-Step: How To Clean A Keurig Coffee Maker
- Power off and unplug the brewer, then detach the water reservoir and lid for easy access.
- Empty the reservoir and rinse it with warm water to remove loose coffee oils or residue.
- Pour the Keurig descaling solution for coffee maker 32 oz into the reservoir and fill with water to the indicated line, creating the cleaning solution.
- Run a cleaning cycle: place a mug on the tray and start a brew cycle without a K-Cup. Repeat until the reservoir is nearly empty to circulate the descaler through all internal passages.
- Pause and let the solution sit in the brew head for about 15 minutes if you notice heavy buildup. Then resume cycles until the reservoir is empty.
- Rinse the reservoir and fill with fresh water. Run multiple rinse cycles (at least 2–3 full cycles) to flush the system until no descaler taste remains.
- Clean the exterior and the mixer areas using a soft cloth. Wipe the needle area with the Keurig cleaning kit for coffee maker including descaler and brush to remove any obstructions or coffee grounds.
- Reassemble the machine, fill the reservoir with fresh water, and run a final couple of plain water brews to ensure all components are clear.
- Test with a cup of plain hot water to confirm no lingering cleaner taste and that the brew temperature is stable.
Troubleshooting
| Symptom | Likely Cause | Fix | Prevention |
|---|---|---|---|
| Brewer stops mid-cycle | Clog in the needle or passageways | Use the Keurig coffee maker needle cleaning brush kit to clear the needle and re-run the cycle | Regular needle checks during cleaning |
| Taste or odor of cleaning solution in brew | Insufficient rinsing cycles | Run 3–5 additional plain water cycles | Always complete the final rinse after descaling |
| Water leaks around the base | Reservoir not seated properly or seal issue | Re-seat reservoir and inspect for cracks | Handle reservoir gently and inspect seals periodically |
| Slow brewing or weak coffee | Mineral buildup or clogged filter | Descale again and clean the brew head | Descale on schedule and use filtered water |
Common Mistakes
- Using vinegar or harsh chemical cleaners not recommended by Keurig
- Skipping the full rinse cycles after descaling
- Forgetting to remove the water filter or forgetting to clean the needle area
- Mixing water hardness or ignoring mineral buildup in hard water regions
Tips For Best Results
- Use filtered water to minimize mineral buildup between cleanings
- Establish a cleaning routine aligned with your water hardness and usage frequency
- Keep a habit of wiping the exterior and surrounding area after each use to prevent coffee splashes from hardening
- Store cleaning tools within easy reach to simplify the process
Call A Professional
Consider professional help if the machine shows persistent leaks, malfunctioning pump, or failure to brew despite thorough cleaning. Stop using the appliance if it emits unusual noises, smells burnt, or shows visible signs of damage. When in doubt about electrical components or seals, contact a certified service technician or the manufacturer for guidance.
FAQ
How often should I descale a Keurig?
Descale every 3–6 months, depending on water hardness and usage frequency. Heavier mineral content may require more frequent cleaning.
Can I use vinegar to descale my Keurig?
Most models are not designed for vinegar; use a Keurig recommended descaling solution or follow the manufacturer’s guidelines for safe descalers.
Do cleaning kits contain all I need?
Many kits include descaler, brush, and other tools designed for a thorough refresh; verify contents before purchase.
Is it safe to run plain water cycles after cleaning?
Yes, multiple plain water cycles are recommended to rinse any residue and ensure clean taste.
Should I remove the water filter before descaling?
Yes, remove and rinse any water filter according to the model’s instructions prior to descaling.
What if the needle is clogged after cleaning?
Use the included needle cleaning brush kit to carefully remove debris; re-test with a brew cycle.
What is the best practice for storage after cleaning?
Dry all components thoroughly and reassemble the reservoir to prevent mold growth between uses.
Buying Guide
Choosing the right cleaning regimen and accessories for a Keurig depends on several factors. Consider size and footprint, as a compact unit may require more frequent, targeted cleanings around the needle area. Noise level matters if the kitchen is near living spaces or bedrooms. Energy efficiency and standby modes influence ongoing power use between brews. Controls should be straightforward, with clear indicators for descaling cycles and reminders for maintenance. Placement matters too: avoid placing the brewer near heat sources and ensure proper ventilation while cleaning. When comparing products, look for certified descalers, comprehensive cleaning kits that include brushes, and compatibility with your Keurig model. A well-chosen cleaning setup keeps flavors bright and extends the life of the brewer.
Leave a Reply