How to Clean the Ender 3 Bed
The Ender 3 uses a heated bed that benefits from regular, careful cleaning to maintain good adhesion and print quality. This guide provides practical steps and safe methods tailored to the Ender 3, using common cleaning tools and a basic maintenance mindset.
Quick Answer
Gently remove excess residue with a soft scraper, wipe the bed with isopropyl alcohol on a microfiber cloth, and recheck for level and adhesion. For PEI sheets, avoid harsh scrapers and use a dedicated magnetic scraper to prevent surface damage.
What You’ll Need
- Ender 3 bed cleaning kit isopropyl alcohol microfiber cloth
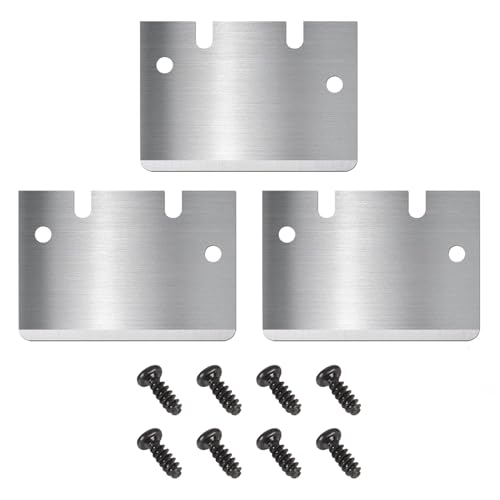
- 3D printer build plate scraper Ender 3 PEI sheet cleaning
- magnetic scraper for 3D printer bed Ender 3 cleaning


Before You Start
Power off the printer and allow the bed to cool before cleaning. Work on a clean, stable surface and avoid touching the nozzle or hot bed with dirty hands. Avoid abrasive pads and strong solvents beyond isopropyl alcohol, as these can scratch or degrade PEI surfaces. Plan for a 10–15 minute routine per session and ensure proper bed leveling after cleaning.
Step-By-Step: How To Clean The Ender 3 Bed
- Power off the printer and let the bed cool completely to ambient temperature.
- Remove any removable PEI sheet if your setup allows, following manufacturer guidance.
- Gently lift and sweep away loose debris with a soft brush or a clean, dry microfiber cloth.
- Apply a small amount of isopropyl alcohol to a microfiber cloth. Wipe the bed surface in a circular motion to dissolve oils and residues.
- For stubborn spots, dampen a fresh microfiber cloth with isopropyl alcohol and repeat, using light pressure.
- If using a PEI sheet, use a magnetic scraper to lift debris from its surface without scratching. Avoid metal blades directly on PEI.
- Reinstall any PEI sheet if removed, ensuring it sits flat without air bubbles.
- Level the bed and re-tighten all mounting screws before the next print to ensure consistent adhesion.
- Run a test print at a low temperature and observe first layer adhesion to confirm cleaning success.
- Clean the nozzle and surrounding area periodically to prevent transfer of residue to the bed during prints.
Troubleshooting
| Symptom | Likely Cause | Fix | Prevention |
|---|---|---|---|
| Bad first layer adhesion after cleaning | Residue left on bed or misleveling | Re-clean bed, re-level, reprint with fresh filament | Clean before each print; check bed temperature |
| Glares or streaks on PEI | Oil from skin or fingerprints | Use alcohol-wiped cloth only; avoid touching with bare hands | Wear clean gloves if handling PEI |
| Scratches on PEI sheet | Using metal scraper directly on surface | Switch to magnetic scraper or plastic scraper | Use proper tools for PEI |
| Uneven bed after cleaning | Bed not level or screws loose | Re-level and tighten mounting hardware | Check level periodically |
Common Mistakes
- Using aggressive scrubs or abrasive pads on PEI or glass beds
- Applying excess alcohol or letting liquid pool on the bed
- Removing the PEI sheet without proper guidance or reinstallation steps
- Neglecting routine bed leveling after cleaning
Avoid these missteps to preserve bed longevity and consistent adhesion across prints.
Tips For Best Results
- Clean food-grade or high-purity isopropyl alcohol to avoid introducing contaminants
- Wipe in a consistent motion from center outward to remove oils evenly
- Match cleaning frequency to print material and heat cycles; flexible sheets may require more gentle care
- Store cleaning supplies in a clean, dry area to prevent contamination
Call A Professional
Stop and seek professional help if you notice persistent bed warping, unusual adhesion issues after cleaning, or if the PEI sheet shows deep scratches or detachment. Complex bed leveling or structural issues may require a technician’s assessment.
FAQ
What cleaner should I use on the Ender 3 bed?
Isopropyl alcohol on a microfiber cloth is recommended for routine cleaning on most beds, including PEI sheets.
Can I clean the bed with water?
Water is not advised for PEI and most print beds; use isopropyl alcohol as the primary cleaner.
How often should I clean the bed?
Clean after every few prints or whenever there is visible residue or poor adhesion.
Do I need to remove the PEI sheet to clean the bed?
It depends on your setup; follow manufacturer guidance. If removable, cleaning the bed beneath the sheet may be necessary.
What tools are best for cleaning a PEI bed?
A microfiber cloth paired with a magnetic or plastic scraper is ideal for PEI surfaces.
Should I re-level after cleaning?
Yes, re-level the bed after cleaning to ensure consistent first-layer performance.
What should I avoid touching the PEI surface with?
Avoid direct contact with bare hands; oils from skin can affect adhesion.
Buying Guide
When selecting cleaning tools and aids for the Ender 3 bed, consider size, material compatibility, and ease of use. A dedicated Ender 3 bed cleaning kit simplifies maintenance and ensures you have compatible items on hand. Look for alcohol-grade microfiber cloths that resist lint, a magnetic scraper designed for PEI surfaces, and a scraper option that won’t scratch delicate coatings. Consider storage and portability if you perform maintenance away from the workstation. Compatibility with PEI sheets and the Ender 3’s bed dimensions is essential for best results.
Leave a Reply