How to Clean Film Off the Inside of a Windshield
Film buildup on the interior surface of a windshield can reduce visibility and create glare. This guide provides clear, practical steps to remove stubborn film safely using common detailing tools and methods. The focus is on interior cleaning to maintain clarity without damaging the glass or coatings.
Quick Answer
Use a combination of a soft microfiber cloth, a specialized interior glass cleaner, and gentle tools to lift film. Start with a microfiber cloth and cleaner, then employ a plastic scraper or handheld razor blade scraper for stubborn spots, finishing with a clean wipe and a protectant to reduce future buildup.
What You’ll Need
- Handheld razor blade scraper for car windshield interior
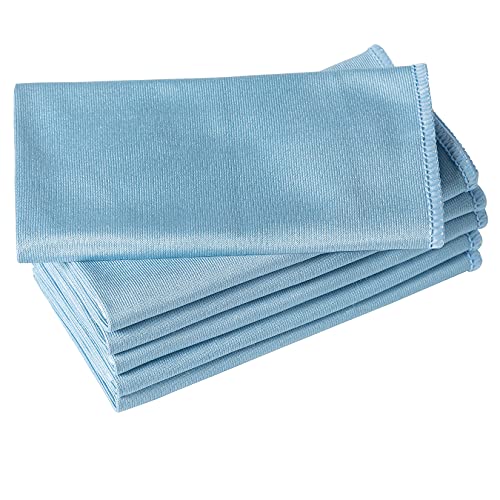
- Microfiber glass cleaning cloth for interior windshield
- Plastic scraper tool for windshield film removal
- Interior glass cleaner or a solvent-safe window cleaner
- Optional: isopropyl alcohol (70%–90%) for tough residues
- Optional: detailing spray or glass protectant for interior use


Before You Start
Work in a shaded, well-lit area to avoid streaks caused by direct sun. Test any cleaner on a small, inconspicuous area of the windshield first to ensure no damage to coatings. Keep the blade at a shallow angle to prevent scratching. Do not apply excessive pressure with the scraper, and avoid metal contact with the glass frame to prevent chipping. Time estimate: 15–40 minutes depending on buildup.
Step-By-Step: How To Clean Film Off The Inside Of A Windshield
- Roll down the window slightly and wipe the interior edge to remove loose dust with a dry microfiber cloth.
- Apply a liberal amount of interior glass cleaner to a fresh microfiber cloth. Wipe in straight, vertical or horizontal motions to lift film without spreading it.
- For stubborn spots, spray cleaner directly on the area and let it sit for 15–30 seconds. Reapply with a microfiber cloth and buff until clear.
- Use a plastic scraper tool for windshield film removal at a very shallow angle to lift remaining film. Avoid scrubbing hard to prevent scratches.
- Switch to a clean section of the microfiber cloth and buff the area to remove any residue. Repeat as needed across the entire interior surface.
- If residue persists, dampen a cloth with isopropyl alcohol and gently wipe the affected area, then rinse with cleaner and dry with a new microfiber cloth.
- Dry the windshield completely with a fresh microfiber cloth to prevent streaks. Remove any excess cleaner from edges and corners.
- Finish with a light spray of detailing glass protectant or a routine interior cleaner to minimize future buildup.
- Inspect from different angles and lighting to confirm clarity across the whole surface. Re-treat any patchy areas as needed.
Troubleshooting
| Symptom | Likely Cause | Fix | Prevention |
|---|---|---|---|
| Streaks after cleaning | Residual cleaner or improper drying | Use a dry microfiber cloth and small, circular buffing motions | Wipe in consistent directions; avoid over-wetting |
| Scratches or hazy spots | Razor blade used with too much pressure | Reduce pressure; switch to plastic scraper | Never force the blade; keep at shallow angle |
| Film returns quickly | Poor ventilation or ongoing exposure to indoor residues | Clean regularly; reduce indoor contaminants near the windshield | Ventilate or use air purifier in the car when parked |
| Sticking cleaner residue | Incompatible cleaner with interior coatings | Switch to a glass-specific interior cleaner | Test cleaner in a hidden area first |
Common Mistakes
- Using harsh solvents that can damage coatings or tint films
- Applying too much cleaner, leading to streaks and additional residue
- Rubbing aggressively with metal objects, risking glass scratches
- Ignoring edges and corners where film tends to accumulate
Tips For Best Results
- Work in short, focused sessions to prevent cleaner drying before you finish a section.
- Keep a dedicated interior microfiber cloths stock to avoid reusing dirty towels.
- Rotate cloths frequently to ensure a clean surface for every pass.
- Lightly humidify the area with cleaner to help lift film more efficiently.
- Consider a routine cleaning plan to reduce buildup over time.
Call A Professional
Stop and seek professional help if the windshield shows deep hazing, crazing, or persistent film that resists standard cleaning. If the interior glass has long-term fogging, unusual discoloration, or visible damage to coatings, a professional detailer can assess and apply industry-grade solutions without risking the glass.
FAQ
Can I use a metal razor blade for interior glass?
No. A metal razor blade can scratch the glass or damage coatings. Use a plastic scraper or a handheld razor blade scraper designed for interior use with caution.
Will cleaning damage the windshield tint or coatings?
Most interior cleaners are safe when used as directed, but always test first and avoid harsh solvents near edges or tinted areas.
How often should I clean interior windshield film?
Regular light cleanings are recommended, with deeper cleanings every few months depending on exposure to indoor residues and sunlight.
What’s the best tool for stubborn film?
A combination approach works best: a plastic scraper for lift, followed by microfiber cloths and a dedicated interior glass cleaner.
Isopropyl alcohol safe for interior glass?
Yes, when diluted and used sparingly on non-coated areas. Avoid prolonged exposure on laminated coatings.
Buying Guide
When choosing tools and cleaners for interior windshield film removal, consider size, noise, and ease of use. Look for a comfortable handheld design for long sessions, non-scratching plastics for scrapers, and a microfiber set that is lint-free. Focus on interior-safe cleaners that do not emit strong odors or harsh solvents. If the windshield area is near a sensitive dashboard or tint, prioritize gentler products and lower agitation. For best results, choose a kit that includes a handheld razor blade scraper for car windshield interior, a microfiber glass cleaning cloth for interior windshield, and a plastic scraper tool for windshield film removal so you have a complete setup in one purchase. Compare kits by the quality of the cloths, the edge safety of scrapers, and the availability of replacement blades or cloths.
Buying Guide: Key Factors
- Size and ergonomics: Choose tools that feel comfortable in hand and reach all corners of the interior without overstretching.
- Noise level: Tools with soft plastics and non-abrasive edges minimize scraping sounds while preserving comfort.
- Energy efficiency and materials: Durable, non-corrosive plastics and quality microfiber cloths extend tool life and performance.
- Controls: Simple, intuitive tools with safe edge guards reduce risk of damage and misuse.
- Placement considerations: Consider your vehicle’s layout and ensure tools fit in the cleaning kit or glove box for quick access.
With the right tools and technique, interior windshield film can be removed effectively, restoring clarity and reducing glare. If in doubt, consult a professional detailer for guidance or service options.
Leave a Reply