How to Clean Kitchen Floor Grout Effectively
Grout lines in kitchen floors can accumulate dirt, stains, and mildew over time, making floors look dull and unclean. With the right approach and the right tools, you can restore brightness to tiled surfaces without replacing them. This guide focuses on practical methods for American households, combining popular cleaning tools and safe techniques.
Readers will learn a quick overview, a clear list of tools, safety tips, step-by-step instructions, troubleshooting, and buying guidance to choose the best grout-cleaning setup for their home.
Quick Answer
Choose a grout cleaning method based on stain severity. For light dirt, a stiff-bristle grout cleaning brush with a manual scrub works well. For tougher stains or mildew, a steam mop with grout cleaning capability or a drill-powered grout cleaning brush set can speed up the job. Always test a small area first and work with the grain of the tile to avoid damage.
What You’ll Need
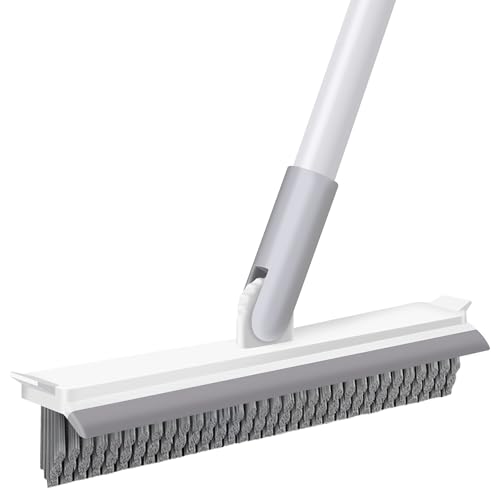
- Stiff-bristle grout cleaning brush long-handled for tile floors
- Steam mop with grout cleaning capability for kitchen floors
- Drill-powered grout cleaning brush set for ceramic tile grout


Before You Start
Prepare the area by sweeping or vacuuming to remove loose debris. Protect nearby cabinetry and appliances with towels or plastic to prevent splashes. If grout is cracked or crumbling, plan for repair or sealing after cleaning. A small, inconspicuous test area is recommended to ensure these tools won’t damage the tile. Expect a cleaning session to take 20–60 minutes depending on grout width and stain depth. Allow floors to dry completely before walking on them.
Step-By-Step: How To Clean Kitchen Floor Grout
- Inspect grout for damage and identify areas with heavy staining or mildew before starting.
- Dry-clean the area by removing loose dirt with a stiff-bristle brush to reduce abrasive buildup during scrubbing.
- Prepare a cleaning solution. For light cleaning, mix warm water with a small amount of mild detergent; for tougher stains, consider a grout-specific cleaner or a baking soda paste with water.
- Using the stiff-bristle grout cleaning brush long-handled for tile floors, scrub along the grout lines in small sections, applying steady pressure and working in a grid pattern.
- For deeper stains, use the drill-powered grout cleaning brush set for ceramic tile grout to apply targeted, rotating scrubs. Maintain a light touch to avoid widening the grout seams.
- Rinse frequently with clean water to remove loosened dirt and cleaner residue. Wipe with a clean cloth or microfiber mop head to prevent new grime from forming.
- If using a steam mop, follow manufacturer instructions to emit steam over grout lines, avoiding excessive moisture on any wood-look tiles or damaged grout. Steam helps loosen embedded grime and can sanitize surfaces.
- Allow grout to air-dry completely. If any stains persist, repeat the scrubbing steps or apply a stain-removing grout cleaner as directed by the product label.
- Apply a grout sealer after the grout is completely dry to protect against future staining and mildew growth. Follow the sealer’s ventilation and safety guidelines.
- Clean surrounding tile surfaces and wipe up any splashes to prevent slipping or staining of adjacent surfaces.
- Inspect the entire floor for uniform brightness and touch up any stubborn spots as needed to achieve even results.
Troubleshooting
| Symptom | Likely Cause | Fix | Prevention |
|---|---|---|---|
| Stains persist after scrubbing | Stain is set or grout is porous | Apply a grout stain remover or consider professional grout cleaning | Seal grout after cleaning to prevent recurrence |
| Grout color uneven after cleaning | Uneven absorption or missed spots | Re-clean with consistent technique and re-seal | Use uniform brushing pressure and thorough rinsing |
| Excess moisture harming adjacent surfaces | Steam or water seeping into cracks | Use steam sparingly and keep water away from baseboards | Address damaged grout before heavy moisture cleaning |
| Brushing causes grout to crumble | Overly aggressive scrubbing or aged grout | Switch to lighter strokes and consider grout repair or re-grouting | Conduct periodic maintenance and sealants |
Common Mistakes
- Over-wetting the grout or floors during cleaning, leading to mold growth
- Using harsh chemicals on delicate tile or sealed grout, causing damage
- Neglecting to rinse or dry grout, leaving residue that attracts dirt
- Skipping a grout sealant, which reduces long-term protection
Tips For Best Results
- Test cleaners on a small area of grout to confirm colorfastness and material compatibility
- Work in small sections to maintain control and prevent grout from drying out mid-clean
- Use a microfiber cloth to wipe down tile surfaces after rinsing for a streak-free finish
- For persistent mildew, consider a diluted hydrogen peroxide solution applied with care and promptly rinsed
- Schedule regular grout cleaning every few months to maintain tile aesthetics
Call A Professional
Consider professional help if grout is severely cracked, crumbling, or if removal and re-grouting are needed. Stop and call a pro if you notice water damage behind tiles, persistent mold growth despite cleaning, or if you lack proper ventilation during chemical use.
FAQ
Can I use a steam mop to clean all grout types?
Steam mops can be effective on many grouts, but avoid excessive moisture on delicate or untreated grout. Always follow the manufacturer’s instructions.
Is sealing grout after cleaning necessary?
Yes, sealing helps prevent staining and mildew and extends the cleanliness of the grout between cleanings.
What should I do if grout turns white after cleaning?
White residue may indicate soap or cleaner buildup; rinse thoroughly and dry before applying a sealer.
How long does grout sealing last?
Sealer longevity depends on traffic and cleaning frequency but generally lasts several months to a few years with proper maintenance.
Are drill-powered grout brushes safe for ceramic tile?
Yes when used with light pressure and appropriate brush heads; avoid aggressive scrubbing to prevent tile or grout damage.
What maintenance should follow the cleaning?
Regular sweeping, prompt splash cleanup, and periodic resealing keep grout looking fresh between deep cleans.
Buying Guide
Choosing the right tools for grout cleaning depends on floor type, stain severity, and maintenance preferences. Here are factors to consider:
- Size and reach: A long-handled brush helps cover vast kitchen areas without bending, while drill-powered brushes accelerate stubborn grime.
- Cleaning power: Stiff-bristle brushes are best for textured grout, whereas steam can aid sanitized, lighter-clean results without chemicals.
- Chemical sensitivity: Prefer milder cleaners if you have a sensitive household, and ensure cleaners are suitable for your tile material.
- Sealing readiness: Plan cleaning cycles that align with sealing schedules to maximize grout longevity.
- Noise and convenience: Steam mops may be louder but reduce chemical usage; manual brushes are quieter and inexpensive but more labor-intensive.
- Maintenance footprint: Choose tools with durable heads and reusable components to minimize waste and maximize value.
Would you like recommendations tailored to a specific tile type (ceramic, porcelain, or natural stone) or flooring layout? For most kitchens, combining a stiff-bristle long-handled brush for routine cleaning with periodic use of a drill-powered brush or steam mop for tougher grout work provides a balanced, effective approach.
Leave a Reply