How to Clean a Wood Fence Before Staining
A well-prepared wood fence yields a better stain finish and longer-lasting protection. Proper cleaning removes dirt, mildew, and old finishes that can prevent stain from penetrating evenly. This guide lays out practical steps, recommended tools, and best practices to achieve a smooth, uniform result on American wooden fences.
Quick Answer
For most wood fences, start with a thorough dry brush to remove loose debris, then wash with a wood-safe cleaner. If heavy grime or mildew is present, use an electric pressure washer for fence cleaning (around 2000 psi) with a soft spray and a stiff nylon brush for wood. Rinse well and let the wood dry completely before staining.
What You’ll Need
- Electric pressure washer for fence cleaning 2000 psi
- Stiff nylon fence cleaning brush for wood
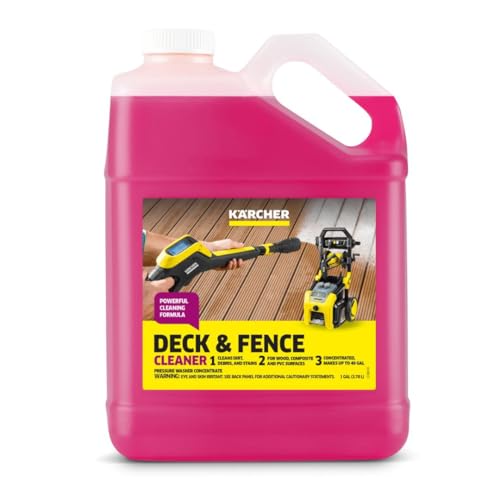
- Wood fence cleaner concentrate spray bottle


Before You Start
Preparing the area is essential. Move furniture, plants, and obstacles away from the fence. Protect nearby plants with plastic sheeting and wear eye protection, gloves, and a mask if using cleaners. Check the weather window: drying times increase in high humidity. Plan for a day or two of drying before staining.
Critical cautions: never use a high-pressure nozzle directly on edges or exposed grain, which can cause splintering. Avoid mixing cleaners with incompatible chemicals. Test a small, inconspicuous area first to gauge color change and wood reaction.
Step-By-Step: How To Clean A Wood Fence Before Staining
- Inspect the fence for loose boards, nails, and rot. Make minor repairs or replace severely damaged boards before cleaning.
- Remove loose dirt with a dry brush or leaf blower to prevent mud from forming during washing.
- Mix or apply a wood fence cleaner concentrate according to the product instructions. Use the wood fence cleaner concentrate spray bottle for spot cleaning or a spray-down in sections.
- Apply the cleaner from bottom to top to avoid streaks, letting it soak for the recommended dwell time (usually a few minutes).
- Gently scrub with the stiff nylon fence cleaning brush for wood to lift mildew, algae, and tannin stains. Focus on vertical boards and horizontal rails where grime accumulates.
- Rinse thoroughly with a low-to-moderate-pressure spray, keeping the nozzle at an angle to prevent wood surface damage.
- For stubborn spots, reapply cleaner and repeat the brushing and rinsing cycle. Avoid saturating the wood to prevent warping.
- Let the fence dry completely, typically 24 to 48 hours depending on weather, before applying stain.
- Perform a final inspection for any remaining gray or rough areas; lightly sand rough spots if needed before staining.
- Proceed with staining following the product’s directions, ensuring even coverage and allowing adequate curing time between coats if multiple are recommended.
- Clean tools promptly after use to preserve cleaner concentrates and brushes for future jobs.
Troubleshooting
| Symptom | Likely Cause | Fix | Prevention |
|---|---|---|---|
| Stain looks uneven after drying | Uneven cleaning or insufficient drying | Re-clean a small area and allow full dry time before restaining | Ensure complete drying and consistent cleaning across all boards |
| Peeling or flaking stain | Remaining old finish or incompatible cleaner | Remove old finish thoroughly and re-clean | Test compatibility and follow cleaner instructions exactly |
| Wood splinters after washing | Too aggressive brushing or high-pressure spray | Reduce pressure and use gentler strokes | Avoid direct high-pressure contact on edges |
| Faint odor or residue after cleaning | Insufficient rinse | Rinse again until water runs clear | Rinse with a wide, steady spray |
Common Mistakes
- Trying to stain a damp fence—never stain before the wood is dry.
- Using overly aggressive cleaning methods that damage the surface.
- Skipping a spot test or not following label directions for cleaners.
- Overlooking hidden mildew behind boards or in corners.
Tips For Best Results
- Work in sections to ensure consistent cleaning and drying times across the entire fence.
- Choose a cleaner specifically formulated for wood to avoid altering color or warping.
- Use a wide spray pattern on the pressure washer and keep the nozzle at a safe distance to minimize fiber damage.
- Angle the spray slightly downward to lift dirt away from the surface rather than forcing it into the grain.
- Clean and inspect gate hinges and hardware during the process to prevent staining residue on metal parts.
Call A Professional
Consider a professional if the fence is very old, heavily mildewed, or if staining requires color transformation. Stop signs to contact a pro include visible rot, large areas of cupping or warping, or repeated wash attempts failing to improve appearance. A professional can assess structural integrity and recommend appropriate cleaners or finishes.
FAQ
What is the best pressure setting for cleaning a wood fence?
Start with a lower pressure and test on a small area, then gradually increase to about 1500–2000 psi while keeping the nozzle at a safe distance to avoid damage.
Can I stain the fence the same day I clean it?
Yes, but only after the wood has fully dried, which can take 24–48 hours depending on temperature and humidity.
Should I use a chemical cleaner or a DIY solution?
For consistent results and wood health, a dedicated wood fence cleaner concentrate is recommended over common household cleaners.
Is sanding necessary before staining?
Lightly sanding rough spots can improve adhesion, but most stains bond well after thorough cleaning and drying.
How often should I clean a wooden fence before staining?
A typical cleaning cycle precedes staining, while maintenance cleaning should occur every 1–3 years depending on climate and exposure.
Buying Guide
Key buying factors help homeowners choose the right tools and products for fence cleaning and staining. Consider the following questions to make an informed choice.
Size and Coverage
Look for a pressure washer with sufficient flow rate and psi to handle wooden fences efficiently without causing damage. A 2000 psi rating is commonly suitable for most wooden fences, but size and reach matter for tall or long fences.
Noise Level
Quiet operation is preferable for neighborhood projects. Check decibel ratings and consider operating during reasonable hours to minimize disruption.
Energy Efficiency
Higher-efficiency machines use less energy per cleaning task. If you clean multiple surfaces, a model with efficient pumps and motors reduces running costs over time.
Controls and Accessories
Look for adjustable pressure and spray patterns, as well as compatible brushes and cleaners. A stiff nylon brush designed for wood helps tackle grime without surface damage.
Placement and Portability
Portable units with wheels ease transport around the yard. Consider storage space and whether you need a lightweight option for frequent maintenance.
Cleaning Solutions
Choose a dedicated wood fence cleaner concentrate that is safe for wood, environmentally friendly, and easy to rinse. Ensure compatibility with your pressure washer and follow label directions.
Maintenance and Longevity
Inspect warranties and replacement parts, such as spray nozzles and brushes. A well-maintained unit lasts longer and delivers consistent performance.
Leave a Reply