How to Clean Phone Microphone
Clean microphones are essential for clear phone calls, video recordings, and voice commands. Debris, oils, and lint can build up in the microphone port or on the grille, muffling sound or causing dropouts. This guide provides practical, safe steps using common tools to restore microphone clarity on smartphones and similar devices.
Regular maintenance can prevent performance issues. The methods below focus on gentle, effective techniques that avoid moisture damage or static buildup while keeping device integrity intact.
Quick Answer
Best practice is to start with a compressible air blower to dislodge debris, then use a soft brush for stubborn particles. If needed, lightly dab with isopropyl alcohol wipes designed for electronics, avoiding excessive moisture. Never insert sharp objects into the microphone port. For frequent cleaning or sensitive devices, consider a dedicated cleaning kit that includes an ultra-fine brush and electronics-grade wipes.
What You’ll Need
- Ultra-fine brush for electronics microphone cleaning
- Isopropyl alcohol wipes electronics cleaning kit for smartphone microphone
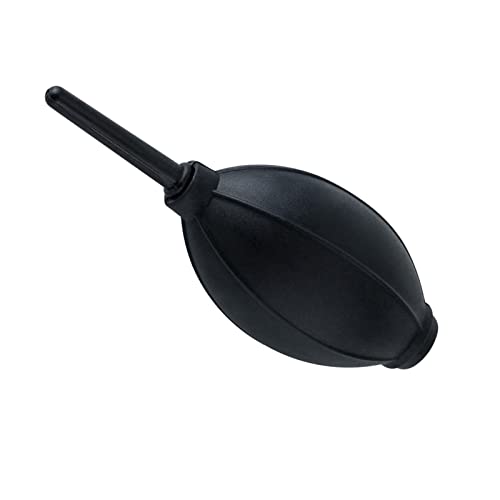
- Compressible air blower for smartphone microphone port


Before You Start
Evaluate the device and choose a low-pressure approach first. Power off the phone and disconnect accessories when possible. Work in a clean, dust-free area to avoid pushing debris deeper into the mic port. Test in a quiet environment after each step to gauge improvement. Time estimate: 5–15 minutes per session, depending on buildup.
Important cautions: avoid liquids entering the microphone opening, never insert metal tools, and keep cleaning materials away from speakers and cameras. If the device is under warranty, use manufacturer-approved cleaning methods to avoid voiding coverage.
Step-By-Step: How To Clean Phone Microphone
- Power off the device and place it on a soft, clean surface to prevent slipping during cleaning.
- Use the compressible air blower to deliver short, gentle bursts into the microphone port from a slight angle, keeping the canister at a safe distance.
- Inspect the mic grille with natural light. If visible debris remains, proceed with a very light brushing.
- Gently sweep the ultra-fine brush across the microphone grille to loosen lint and dust without applying pressure into the port.
- Wipe the immediately surrounding area with an electronics-safe isopropyl alcohol wipe, ensuring only the grille is contacted. Do not saturate the device.
- Re-test the microphone by placing a brief voice note or making a short call to confirm clarity.
- If sound remains muffled, repeat the blowing and brushing steps in short cycles, avoiding over-wetting any area.
- For stubborn residue, use a new wipe and lightly dab the edge of the microphone housing, never directly inside the port.
- Let the device dry for a few minutes in a cool, ventilated area before powering it back on.
- Run another quick test to ensure consistent audio capture from the front or built-in microphone, as applicable.
- Document the cleaning session and schedule routine maintenance to prevent buildup over time.
Troubleshooting
| Symptom | Likely Cause | Fix | Prevention |
|---|---|---|---|
| Muted or muffled sound | Dust in the mic port or grille | Repeat gentle air blowing and brushing | Clean every few weeks; avoid moisture exposure |
| Static or crackling during recording | Static buildup or moisture | Wipe with electronics-safe wipe and dry completely | Keep device dry; use a protective case to reduce exposure |
| Pop or whistle in recordings | Debris blocking the mic or grille proximity | Inspect and clear grille; verify mic position | Store in clean environment; avoid touching mic area |
| Intermittent microphone | Contact issue near the port | Careful re-seat of accessories; check docking connectors | Use official or high-quality accessories |
Common Mistakes
- Using sharp tools or metal objects to poke the mic hole
- Applying excessive liquid near the port
- Relying on deep cleaning that pushes debris further inside
- Cleaning while the device is powered or charging
- Neglecting to dry the area after any wipe or spray
Following careful, measured steps reduces the risk of damage and preserves mic performance over time.
Tips For Best Results
- Clean in a well-lit area so you can see debris clearly
- Use a fresh ultra-fine brush for each cleaning session to avoid transferring oils
- Limit isopropyl wipes to electronics-grade and avoid high concentrations near ports
- Consider a routine schedule based on usage, especially after outdoor or sweaty activities
- Store cleaning tools in a case to keep them dust-free between uses
Call A Professional
Consult a professional if the microphone remains problematic after multiple cleaning attempts, if the device has water exposure, or if the phone is under warranty and cleaning might affect coverage. Seek service if you notice corrosion, liquid damage indicators, or physical damage around the mic area.
FAQ
Can I clean my microphone with water?
Water should be avoided. Use electronics-safe wipes or compressed air and dry thoroughly before powering the device.
How often should I clean a phone microphone?
Cleaning every 4–12 weeks is reasonable for average use; increase frequency after outdoor, dusty, or sweaty activities.
Will I void my warranty by cleaning the mic myself?
Generally no if you follow manufacturer guidelines and avoid liquids entering the internals. Check your warranty terms for specifics.
What tools are essential for mic cleaning?
A compressible air blower, an ultra-fine brush for electronics, and electronics-safe isopropyl wipes are the core tools.
Buying Guide
Choosing the right gear for maintaining a phone microphone involves several factors. Size and portability matter if you travel with a cleaning kit. Consider noise level and air pressure of the blower to avoid forcing debris deeper into the port. Energy efficiency is less critical for a manual tool, but compact gadgets with minimal battery usage are convenient for on-the-go use. Look for a kit that includes an ultra-fine brush and electronics wipes designed for sensitive components. Controls should be simple, with clear instructions. Placement considerations include whether you need cleaning tools for multiple devices or only a single smartphone. Compare sets that emphasize gentle, non-contact methods and protective packaging to prevent contamination. A well-rounded kit helps keep microphones clear across different devices, from smartphones to tablets.
Leave a Reply