Baking Soda Cleaning Guide for Tile Floors
Tile floors are a durable and stylish option for kitchens, bathrooms, and entryways. Using baking soda as part of a cleaning routine can help tackle grime, stains, and grout buildup without harsh chemicals. This guide walks through a practical, step-by-step method suitable for most ceramic and porcelain tile surfaces found in American homes.
With simple ingredients and common cleaning tools, homeowners can refresh tile floors while preserving grout integrity. The method emphasizes safe practices, surface prep, and effective techniques for both everyday cleaning and more stubborn stains.
Quick Answer
Best daily approach: Sweep or vacuum, then mop with a warm water and baking soda solution. For grout, apply a paste and scrub with a stiff-bristle brush. For deeper cleaning, combine a baking soda solution with a microfiber mop head for thorough coverage.
What You’ll Need
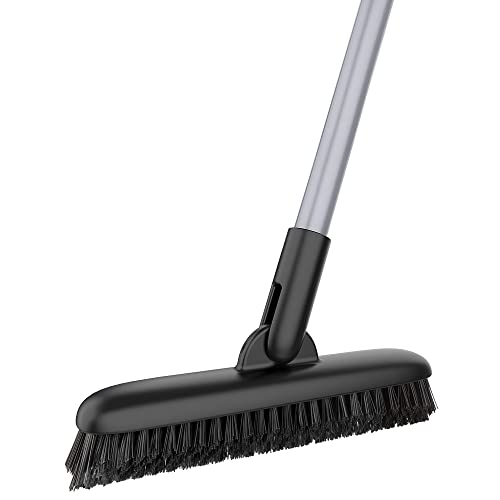
- Stiff-bristle tile floor scrub brush baking soda grout cleaner
- Microfiber mop head tile floor cleaning baking soda solution
- Grout cleaning brush kit baking soda tile floor cleaner

Before You Start
Prepare the area by removing rugs or furniture to expose the full tile surface. Vacuum or sweep to remove loose dirt and debris. Mix a gentle cleaning solution using baking soda and warm water; avoid using excessive water on very porous grout. If you have sensitive skin, wear gloves, and ensure good ventilation in bathrooms and kitchens. The time estimate for a standard cleaning session is 20–40 minutes, depending on floor size and grout condition. Do not mix baking soda with acidic cleaners like vinegar in a confined space, as this can create suds or fumes.
Step-By-Step: How To Clean Tile Floors With Baking Soda
- Dry-clean the surface by sweeping or vacuuming to remove dust and grit that can scratch tile during cleaning.
- Prepare a mild cleaning solution: in a bucket, dissolve baking soda in warm water until the mixture forms a light paste consistency for tougher spots.
- Apply the solution to the tile floor using a microfiber mop head. Focus on high-traffic areas and spots with visible grime.
- For grout lines, sprinkle a thin layer of baking soda paste directly onto the grout and let it sit for 5–10 minutes to penetrate oils and soil.
- Scrub grout with a stiff-bristle brush or a dedicated grout cleaning brush kit. Use small circular motions to lift embedded grime without damaging the grout.
- Rinse the floor with clean water or a fresh baking soda solution to remove loosened dirt and residue. Wring the mop frequently to avoid spreading grime.
- For stubborn stains, repeat the paste application and scrubbing step, then rinse thoroughly. Consider a second pass with a clean mop if residue remains.
- Dry the floor with a clean towel or allow it to air-dry to prevent water spots and streaks, especially on glossy tile surfaces.
- Re-sweep or re-vacuum after drying to capture any remaining dust or particles that surfaced during cleaning.
- Replace rugs and move furniture back into place once floors are completely dry and free of moisture that could attract dirt.
- Track soil from entrances by placing a dry mat at thresholds to reduce future grime buildup.
- For routine maintenance, repeat the process every 1–2 weeks or as needed based on traffic and soil level.
Troubleshooting
| Symptom | Likely Cause | Fix | Prevention |
|---|---|---|---|
| Streaks after cleaning | Residue from too much baking soda solution | Rinse floors thoroughly with clean water | Use sparing amounts of solution |
| Grout looks discolored | Deep soil buildup | Apply baking soda paste, scrub with a stiff brush, rinse | Schedule regular grout cleaning |
| Scratching on glossy tile | Rough scrub brush or abrasive cleaner | Switch to a softer pad and gentle motion | Use soft cleaning tools for delicate surfaces |
| Excess moisture causing mold | Over-wetting grout lines | Limit water usage around grout; dry promptly | Ventilate and dry kitchen or bathroom floors after cleaning |
Common Mistakes
- Using highly abrasive brushes on delicate tile or finish
- Over-wetting grout, which can weaken its seal
- Mixing baking soda with incompatible cleaners or vinegar in enclosed spaces
- Skipping a thorough rinse, leaving residue that attracts more dirt
Tips For Best Results
- Test a small, inconspicuous area first to ensure the baking soda solution does not discolor or dull the tile.
- Use a microfiber mop head for better pickup of loose soil and oils.
- Work in sections to maintain a consistent cleaning pace and prevent drying residue.
- Pair baking soda with a light elbow grease for stubborn grout without harsh chemicals.
- Schedule regular grout maintenance to prevent heavy buildup and simplify future cleanings.
Call A Professional
Consider contacting a pro if tile surfaces show significant wear, grout has extensive cracking, or stains persist after multiple cleanings. Stop signs include persistent mold growth, large areas of efflorescence, or damaged grout that may require regrouting or sealing by a specialist.
FAQ
Is baking soda safe for all tile floors?
Generally safe for ceramic and porcelain tiles when used with gentle scrubbing. Avoid overly aggressive tools on delicate finishes and always test a small area first.
Can baking soda damage grout?
When used properly with a soft brush and thorough rinsing, baking soda helps clean grout without harming it. Avoid excessive scrubbing that could wear down grout over time.
How often should I clean tile floors with baking soda?
For high-traffic areas, consider cleaning every 1–2 weeks. In low-traffic areas, monthly cleaning may suffice.
Do I need to seal grout after cleaning?
Sealing grout helps prevent stains and moisture absorption. Re-seal based on the grout type and level of use—vacuum and test areas to ensure adhesion.
What other cleaners pair well with baking soda?
Warm water and a microfiber mop head work well; for tough stains, a small amount of mild dish soap can be added, ensuring thorough rinsing afterward.
Should I use vinegar with baking soda for tile cleaning?
No. Mixing vinegar and baking soda creates a temporary foaming reaction and does not improve cleaning efficiency. Use baking soda alone or with mild cleaners as needed.
Buying Guide
Choosing the right tools and approach improves results when cleaning tile floors with baking soda. Factors to consider include size of the area, noise level of cleaning tools, energy efficiency of powered devices, control options, and placement in the home.
- <bSize and layout: Large open areas benefit from a wide-mop head or powered mop to reduce cleaning time, while tight corners need a smaller brush or corner attachment.
- Noise level: For shared spaces or homes with sleeping children, select quiet mop heads or low-noise brushes.
- Energy efficiency: Corded vs. cordless mops—cordless options offer mobility but may require charging; evaluate battery life for larger jobs.
- Controls and usability: Easy-water measurement, adjustable handle height, and ergonomic grips improve comfort during cleaning sessions.
- Placement and storage: Store cleaning tools in a dry, accessible area near the cleaning space to streamline routine maintenance.
When evaluating cleaning kits, consider how the included tools align with tile type and grout condition. For many homes, a combination of a stiff-bristle tile floor scrub brush, a grout cleaning brush kit, and a microfiber mop head provides a balanced approach to both everyday cleaning and grout restoration. Do you prefer a single all-in-one kit or separate tools that can be swapped as needed? The best choice supports your cleaning habits, floor material, and grout care routine.
Leave a Reply