How to Clean Air D Ducts and Coils Safely
Keeping indoor air clean improves comfort and health, especially for households with allergy or asthma concerns. Cleaning the right components—air ducts, dryer vents, and evaporator coils—helps reduce dust buildup, improve airflow, and boost system efficiency. This guide focuses on practical steps using common cleaning tools designed for HVAC maintenance and home safety.
Quick Answer
Best first steps: remove loose dust from accessible surfaces, use a dedicated HVAC air duct cleaning brush kit for ducts, a dryer vent cleaning kit to clear the path outside, and an air conditioner coil cleaning brush kit for the condenser and evaporator coils. Work in a dry, ventilated space and wear a mask and safety glasses.
What You’ll Need
- HVAC air duct cleaning brush kit for sweeping ducts and registers
- dryer vent cleaning kit brush and blower to clear lint and debris from exterior vents
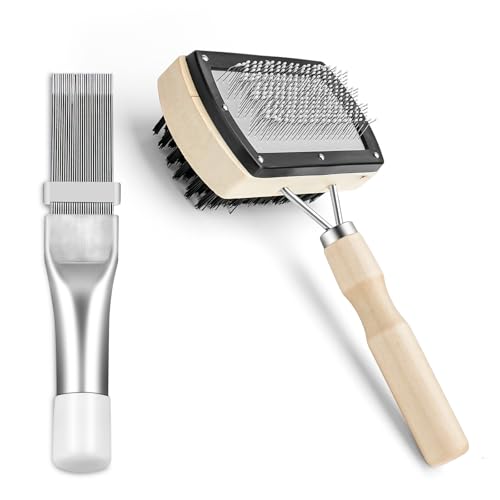
- air conditioner coil cleaning brush kit to scrub coils without damaging fins
- Soft lint-free rags or microfiber cloths
- Detergent or coil cleaner recommended by manufacturers
- Vacuum with a HEPA filter (preferably)
- Safety gear: gloves, safety glasses, dust mask or respirator


Before You Start
Prepare the space: shut off power to the HVAC system at the breaker, and seal off the work area to limit dust spread. If cleaning a dryer vent, unplug the dryer and move it away from walls to access the vent path. Never use harsh chemicals on coils or inside ducts without manufacturer approval. Prepare clamps, brushes, and extensions to reach into tight ducts. Plan a cleaning window that minimizes disruption and allows time for drying and air-drying after cleaning.
Step-By-Step: How To Clean Air Ducts And Coils
- Inspect all accessible duct registers and vents for obvious blockages, then remove vent grilles for thorough brushing.
- Use the HVAC air duct cleaning brush kit to gently loosen dust along the length of each duct run. Work from the main trunk toward the branch lines to avoid pushing debris deeper.
- Vacuum the loosened dust with a HEPA-equipped vacuum, moving slowly to maximize pickup and minimize re-suspension of particles.
- Switch to the dryer vent cleaning kit brush and blower to clear the exterior vent and the vent pathway. Rotate the brush to dislodge lint that may accumulate in bends.
- Reassemble exterior vent parts, ensuring all connections are secure and weatherproof if outdoors. Run the blower briefly to verify airflow and listen for any unusual resistance.
- For the air conditioner, use the air conditioner coil cleaning brush kit on the outdoor condenser coils first. Gently brush fins in a direction consistent with the coil pattern to avoid bending the fins.
- Move to the indoor evaporator coil (if accessible) and apply a coil-safe cleaner as directed by product instructions. Use the brush to agitate the coil surface carefully, then wipe away residue with a damp cloth.
- Recheck the entire system for loose debris and dust. Vacuum again if necessary and reinstall all grilles and panels securely.
- Reconnect power and run a test cycle. Listen for unusual noises and monitor airflow from vents to confirm improved performance.
- Schedule routine maintenance every 1–2 years, or more often for homes with pets, smokers, or high dust levels. Consider annual professional inspection for duct integrity and coil efficiency.
- If odors persist or there is visible mold growth, stop and seek professional guidance to avoid releasing contaminants into living spaces.
Troubleshooting
| Symptom | Likely Cause | Fix | Prevention |
|---|---|---|---|
| Reduced airflow after cleaning | Debris trapped in ducts | Re-sweep with HVAC brush kit and re-vacuum | Seal registers during cleaning; use proper brushes |
| A strong dusty odor | Residual dust released during cleaning | Re-clean with gentler brushes and a damp cloth | Ventilate during and after cleaning; use sealable bags for removed dust |
| Coil fins bent | Harsh brushing on coils | Switch to a fins-friendly brush and work gently | Follow fin directions; use a fin comb if needed |
| Lint blocking dryer vent | Partial vent blockage | Extend reach with brush; clear with blower | Regular dryer vent maintenance |
| Moisture or mold after cleaning | Moisture exposure or mold present | Apply appropriate mold-inhibiting cleaner; dry thoroughly | Ensure dry environment; fix any leaks |
Common Mistakes
- Using harsh chemicals on coils or ducts without guidance
- Forcing brushes into tight bends without extensions
- Neglecting to power down the system and secure the area first
- Over-wetting coils or ducts, which can cause mold growth
To avoid issues, follow brush manufacturer instructions, use the correct tools for each component, and keep a steady, controlled pace during cleaning.
Tips For Best Results
- Plan a staged cleaning: ducts first, then exterior vents, then coils.
- Protect living spaces by closing doors and using plastic sheeting to trap dust.
- Keep a dedicated set of cleaning tools for HVAC tasks to prevent cross-contamination.
- Inspect and replace toilet and air filters on the system after cleaning to maximize air quality.
- Document the process with photos to monitor changes over time and assist future maintenance.
Call A Professional
Consider professional help if you notice persistent dust reaccumulation, significant mold growth, pest infestation, or structural duct damage. Stop cleaning and consult a pro if you encounter:
- Extensive mold or water damage inside ducts
- Extremely heavy or hard-to-remove debris buildup
- Unusual system noises, unusual odors, or inadequate airflow after cleaning
- Uncertain compatibility of cleaning agents with your HVAC system
FAQ
Can I clean air ducts myself, or should I hire a professional?
For routine maintenance and visible dust removal, DIY cleaning with the right tools can help. For complex ductwork, mold issues, or uncertain materials, a professional assessment is recommended.
Is it safe to use a dryer vent cleaning kit on an air duct?
Dryer vent tools are designed for a different path and lint type. Use dedicated HVAC duct brushes for ducts and dryer vent brushes only for the dryer vent path.
How often should I clean coils and ducts?
Coils and ducts typically benefit from cleaning every 1–3 years, depending on usage, pets, and dust levels. More frequent cleaning may be needed in high-dust environments.
What signs indicate I need a professional cleaning?
Persistent odors, visible mold, extensive debris, or airflow problems after DIY cleaning suggest professional assistance is advisable.
What precautions improve safety during cleaning?
Shut off power, wear protective gear, work in a well-ventilated area, and avoid over-wetting components to prevent mold growth.
Buying Guide
When selecting cleaning tools for air ducts, dryer vents, and coils, consider size, compatibility with your system, and ease of use. Here are key buying factors to compare:
- Size and reach: Choose kits with extendable rods or flexible brushes that fit your duct lengths and coil spaces without forcing bends.
- Tool quality and material: Look for non-abrasive bristles that won’t damage coil fins or duct linings.
- Compatibility: Ensure brushes work with standard HVAC duct diameters and vent sizes in your home.
- Seal and containment: Use a vacuum with a HEPA filter to capture dust and minimize resuspension.
- Safety features: Heat-resistant handles, comfortable grips, and anti-slip surfaces help reduce accidents during use.
- Maintenance and replacement parts: Check availability of replacement brushes, wands, and connectors to extend tool life.
- Noise and disruption: Some tools operate quietly, which helps in occupied homes; consider models with lower noise ratings.
- Price vs. value: Higher-quality kits may be pricier but save time and reduce risk of damage.
Thinking about a complete DIY kit? Compare a HVAC air duct cleaning brush kit, a dryer vent cleaning kit brush and blower, and an air conditioner coil cleaning brush kit for a well-rounded approach. If unsure about the optimal kit mix for the home, a short professional assessment can clarify needs and prevent missteps.
Leave a Reply