How to Clean a Camper AC Unit
Maintaining a clean camper air conditioning system helps keep your RV comfortable and energy efficient. Regular cleaning reduces odors, improves airflow, and can extend the life of your unit. This guide provides practical, step-by-step instructions tailored to typical RV setups and uses common cleaning tools designed for mobile living.
Quick Answer
Clean the evaporator coil, ducts, and condensate drain regularly. Use a dedicated RV coil cleaner spray, a vent cleaning brush for tight spaces, and a condensate drain kit to prevent clogs. Rinse with water, dry thoroughly, and run a test cycle to verify performance.
What You’ll Need
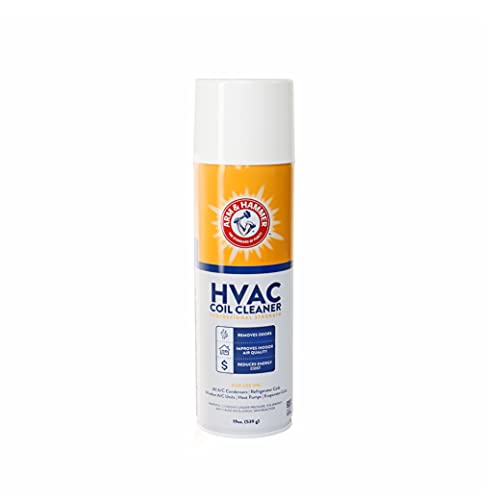
- RV air conditioner coil cleaner spray for RV
- RV AC vent cleaning brush
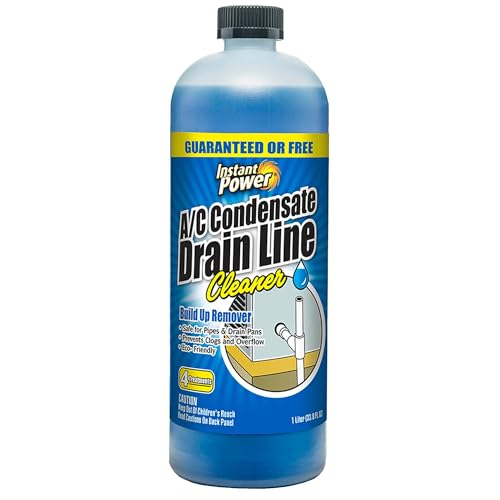
- RV air conditioner condensate drain cleaning kit
- Protective gloves and eye protection
- Soft cloths or towels
- Water spray bottle or gentle hose
- Flashlight or headlamp for visibility

Before You Start
Before beginning, ensure the RV is parked on a flat surface and the A/C is turned off from any power source. Disconnect the power to the entire electrical system if you’re working near live circuits. Protect skin and eyes when handling cleaning solutions. Clear the area around the vent and outdoor unit to prevent contamination of interior fabrics. Allow ample time for drying; damp insulation can cause odors or mold growth.
Step-By-Step: How To Clean Your Camper AC Unit
- Turn off and unplug the RV’s air conditioning system. Remove any vent covers or grills to access the internal components.
- Inspect the exterior unit and shroud for debris. Remove leaves, dust, and insects using a brush or compressed air if available.
- Apply the RV coil cleaner spray to the evaporator coil following the product’s instructions. Let it dwell for the recommended time to loosen buildup.
- Gently rinse the coil from the indoor side or use a damp cloth to wipe away loosened dirt. Avoid harsh scrubbing that could damage fins.
- Use the RV AC vent cleaning brush to clear interior ducts and louvers. Work slowly to dislodge dirt without bending delicate components.
- Check the condensate drain line for blockages. Open the drain access and use the condensate drain cleaning kit to flush out debris.
- Rinse vents and drain areas with a light spray of water if the product guidelines permit. Ensure all moisture is removed from the cabinet and ductwork.
- Reassemble the vent covers and grills. Wipe down the exterior housing with a dry cloth to remove any residual cleaner.
- Reconnect power and run a test cycle. Listen for unusual noises and verify that air is flowing steadily from vents at a comfortable temperature.
- Schedule regular cleanings—seasonally or every few months during heavy use—to maintain efficiency and air quality.
Troubleshooting
| Symptom | Likely Cause | Fix | Prevention |
|---|---|---|---|
| Weak airflow from vents | Clogged ducts or dirty filter | Clean ducts with vent brush; replace/clean filter | Inspect and clean monthly during peak season |
| Unpleasant odor | Mold or mildew in ducts | Clean with approved coil cleaner; ensure complete drying | Keep area dry; use vent to circulate air |
| Water leaking from condensate line | Clog or improper drainage | Clear drain line with condensate kit; verify slope | Regular drain maintenance |
| Coil residue after cleaning | Insufficient rinsing | Rinse thoroughly; reapply cleaner if needed | Follow product guidelines precisely |
Common Mistakes
- Using household cleaners that can corrode plastics or electrical components
- Over-wetting the interior to the point of dripping into electrical parts
- Neglecting the condensate drain, leading to standing water and odors
- Forcing brushes through tight bends, causing panel damage
Tips For Best Results
- Schedule cleaning when the outdoor temperature is moderate to avoid heat stress on components.
- Use a dedicated RV coil cleaner designed for low humidity and safe for RV materials.
- Inspect seals around the indoor unit; replace worn gaskets to maintain efficiency.
- Keep a spare filter on hand and replace it after every few cleanings for best airflow.
- Label hoses and lines to prevent confusion during reassembly.
Call A Professional
Consider a pro if you notice persistent leaks, frost on coils, unusual noises, or if you’re uncomfortable handling electrical components or refrigerant lines. Do not attempt repairs that involve opening sealed refrigerant systems, as improper handling can be dangerous and illegal in some areas.
FAQ
Is it safe to use RV-specific coil cleaner on all camper AC units?
Yes, RV-specific cleaners are formulated for typical mobile air conditioners and are safer for plastics and coatings used in RVs.
How often should I clean my camper AC’s condensate drain?
Check monthly during peak use and clean the drain when you notice slow drainage or odors.
Can I clean the ducts without removing the vent covers?
Partial cleaning is possible, but removing covers provides better access and a more thorough job.
What if the unit doesn’t start after cleaning?
Ensure power is connected, reset the unit, and inspect fuses. If problems persist, contact a professional.
Buying Guide
Choosing the right cleaning tools and accessories for a camper AC unit involves several factors. First, consider the size and layout of your RV’s HVAC system to select compatible coil cleaners and brushes. Look for energy-efficient, low-residue formulas that won’t leave sticky films on coils. Evaluate noise levels and the placement of the exterior unit to minimize disruption when running the fan. Controls should be straightforward, with clear instructions for safe operation during maintenance. Finally, assess storage space for cleaning supplies and ensure you have a reliable condensate drain kit for quick, on-the-go maintenance.
Leave a Reply