How to Clean a Sandwich Press: A Practical Guide for American Kitchens
Keeping a sandwich press clean ensures optimal grill marks, prevents lingering odors, and extends the appliance’s life. This guide provides a clear, step-by-step approach using common tools and safe cleaning methods suitable for most electric panini presses.
Quick Answer
Unplug the press, let it cool, wipe away crumbs with a dry cloth, then use a non-abrasive cleaner and a soft brush or microfiber cloth to remove stuck-on residue. Finish with a light wipe of a clean, damp cloth and allow to dry before storage or next use.
What You’ll Need
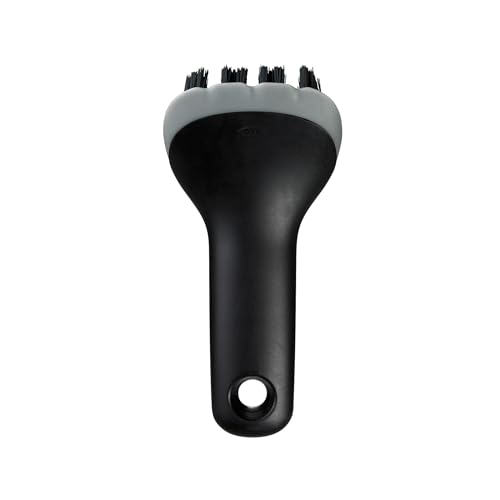
- Panini press cleaning brush silicone bristles
- Non-abrasive grill cleaner spray for electric panini press
- Microfiber cleaning cloth for sandwich press non-scratch

Before You Start
Safety first: unplug the appliance and let it cool completely before cleaning. Remove any removable plates if your model allows it, and check the user manual for specific instructions. A light, routine cleaning after each use prevents buildup and makes deep cleaning easier. Time estimate: 5–10 minutes for routine clean; 15–30 minutes for a thorough wipe-down and plate removal.
Critical cautions: never submerge the base in water, never use metal scrapers, and avoid harsh solvents that can damage coatings. If your press has a nonstick coating, use only non-abrasive tools and cleaners designed for nonstick surfaces.
Step-By-Step: How To Clean A Sandwich Press
- Unplug and cool: Ensure the unit is completely cool before handling.
- Remove detachable plates: If your model has removable plates, take them off and wash them in warm, soapy water or in the dishwasher if permitted by the manufacturer.
- Clear loose debris: Use a dry microfiber cloth to wipe away crumbs and loose residue from the plates and hinges.
- Apply cleaner sparingly: Lightly mist the non-abrasive grill cleaner spray for electric panini press onto the plates or a microfiber cloth, avoiding the electrical components.
- Gently scrub: Use the panini press cleaning brush silicone bristles to loosen burnt-on bits without scratching the surface.
- Wipe clean: Wipe away loosened residue with a clean microfiber cloth, repeating as needed until the surface is smooth.
- Rinse if needed: Lightly dampen a cloth with water to remove any cleaner residue; ensure no moisture remains on interior surfaces before reassembly.
- Dry thoroughly: Allow plates to air-dry completely or pat with a dry cloth before reassembling.
- Clean the exterior: Wipe the exterior housing with a damp cloth, avoiding the control panel unless the product manual allows it.
- Reassemble and test: Reattach plates, plug in, and run a brief warm-up with a paper towel or cloth to ensure there’s no residue transfer before cooking.
- Establish a routine: Clean after each use to prevent buildup and maintain performance.
- Store properly: Ensure the unit is completely dry and stored in a clean, dry place.
Troubleshooting
| Symptom | Likely Cause | Fix | Prevention |
|---|---|---|---|
| Stubborn brown residue on plates | Built-up oils from repeated use | Soak removable plates (if allowed) in warm, soapy water; scrub with silicone brush | Wipe plates after each use; light cleaning with cleaner spray |
| Cleaner residue after wipe-down | Excess cleaner left on surface | Wipe with a clean damp cloth until residue disappears | Use sparingly; follow product directions |
| Uneven heating or sticking plates | Improper cleaning near electrical components | Keep cleaners away from the base; ensure plates are completely dry | Clean only recommended areas and allow full drying |
| Scratches on nonstick surface | Using abrasive tools | Switch to a silicone bristle brush and non-abrasive cloth | Never use metal tools or harsh scouring pads |
Common Mistakes
- Using abrasive brushes or steel wool on nonstick plates
- Submerging the main unit in water or exposing electrical parts to moisture
- Rushing the drying process, leaving moisture on interior surfaces
- Using excessive cleaner that leaves a film
Tips For Best Results
- Perform a quick wipe-down after each use to minimize buildup.
- Store plates separately if your model allows to avoid warping or damage.
- Use a dedicated panini press cleaning brush with silicone bristles for safe scrubbing.
- Test any cleaner on a small area first to ensure compatibility with nonstick coatings.
- Label cleaning towels to avoid cross-contamination with food prep areas.
Call A Professional
Seek professional help if the unit shows signs of electrical damage, unusual odors persisting after cleaning, leaking from internal components, or if the nonstick coating appears compromised. Do not attempt internal repairs yourself if the device is under warranty or if you observe exposed wiring.
FAQ
Is it safe to put the panini plates in the dishwasher?
Only if the manufacturer explicitly states that removable plates are dishwasher-safe; otherwise, wash by hand with warm, soapy water.
Can I use vinegar or baking soda on a sandwich press?
Use non-abrasive cleaners designed for electric grills; consult the manual before applying acidic or abrasive substances.
How often should I clean my sandwich press?
Wipe down after each use and perform a deeper clean weekly or as buildup necessitates.
What parts should never get wet?
Avoid submerging the base, electrical contacts, and any cords or control panels in water.
Can I clean the exterior with a spray but not the plates?
Yes, wipe the exterior with a damp cloth; avoid spraying cleaner onto the control panel or electrical areas.
What if my plates remain sticky after cleaning?
Reseat thoroughly, reheat briefly, and wipe with a clean microfiber cloth; consider a light re-seasoning if the plates allow.
Will cleaners affect food taste?
Rinse and wipe until no cleaner residue remains; use food-safe products and allow full drying before cooking.
Buying Guide
When choosing or upgrading a sandwich press, consider factors that affect cleaning ease and long-term upkeep. Size matters for countertop space and storage compatibility. Noise level can be a concern in open kitchens and apartments. Energy efficiency influences ongoing use costs and heat distribution. Controls should be intuitive, with clear indicators for heat level and timer settings. Placement considerations include near heat-sensitive surfaces, shelves, and away from moisture-prone areas.
Key buying factors to explore:
- Size and capacity: Ensure it fits your counter and accommodates typical sandwich sizes you make.
- Surface and coating: Nonstick coatings simplify cleaning; check for warranty on coatings.
- Cleaning accessibility: Removable plates and dishwasher-safe parts can simplify maintenance.
- Heat controls: Even heating and adjustable temperature help with different fillings and cleanup scenarios.
- Build quality and materials: Durable housing and easy-to-clean surfaces reduce maintenance effort.
- Included cleaning tools: Availability of a dedicated cleaning brush or recommended cleaners can streamline care.
- Placement and storage: Consider cord length and whether the unit stores upright or flat to minimize clutter.
For most households, a model that balances ease of cleaning, reliable performance, and straightforward maintenance offers the best long-term value. If you regularly prepare sticky or cheese-heavy fillings, prioritize nonstick durability and accessible plate cleaning.
Leave a Reply